
Cozy Bear in a Scarf Amigurumi Crochet Pattern
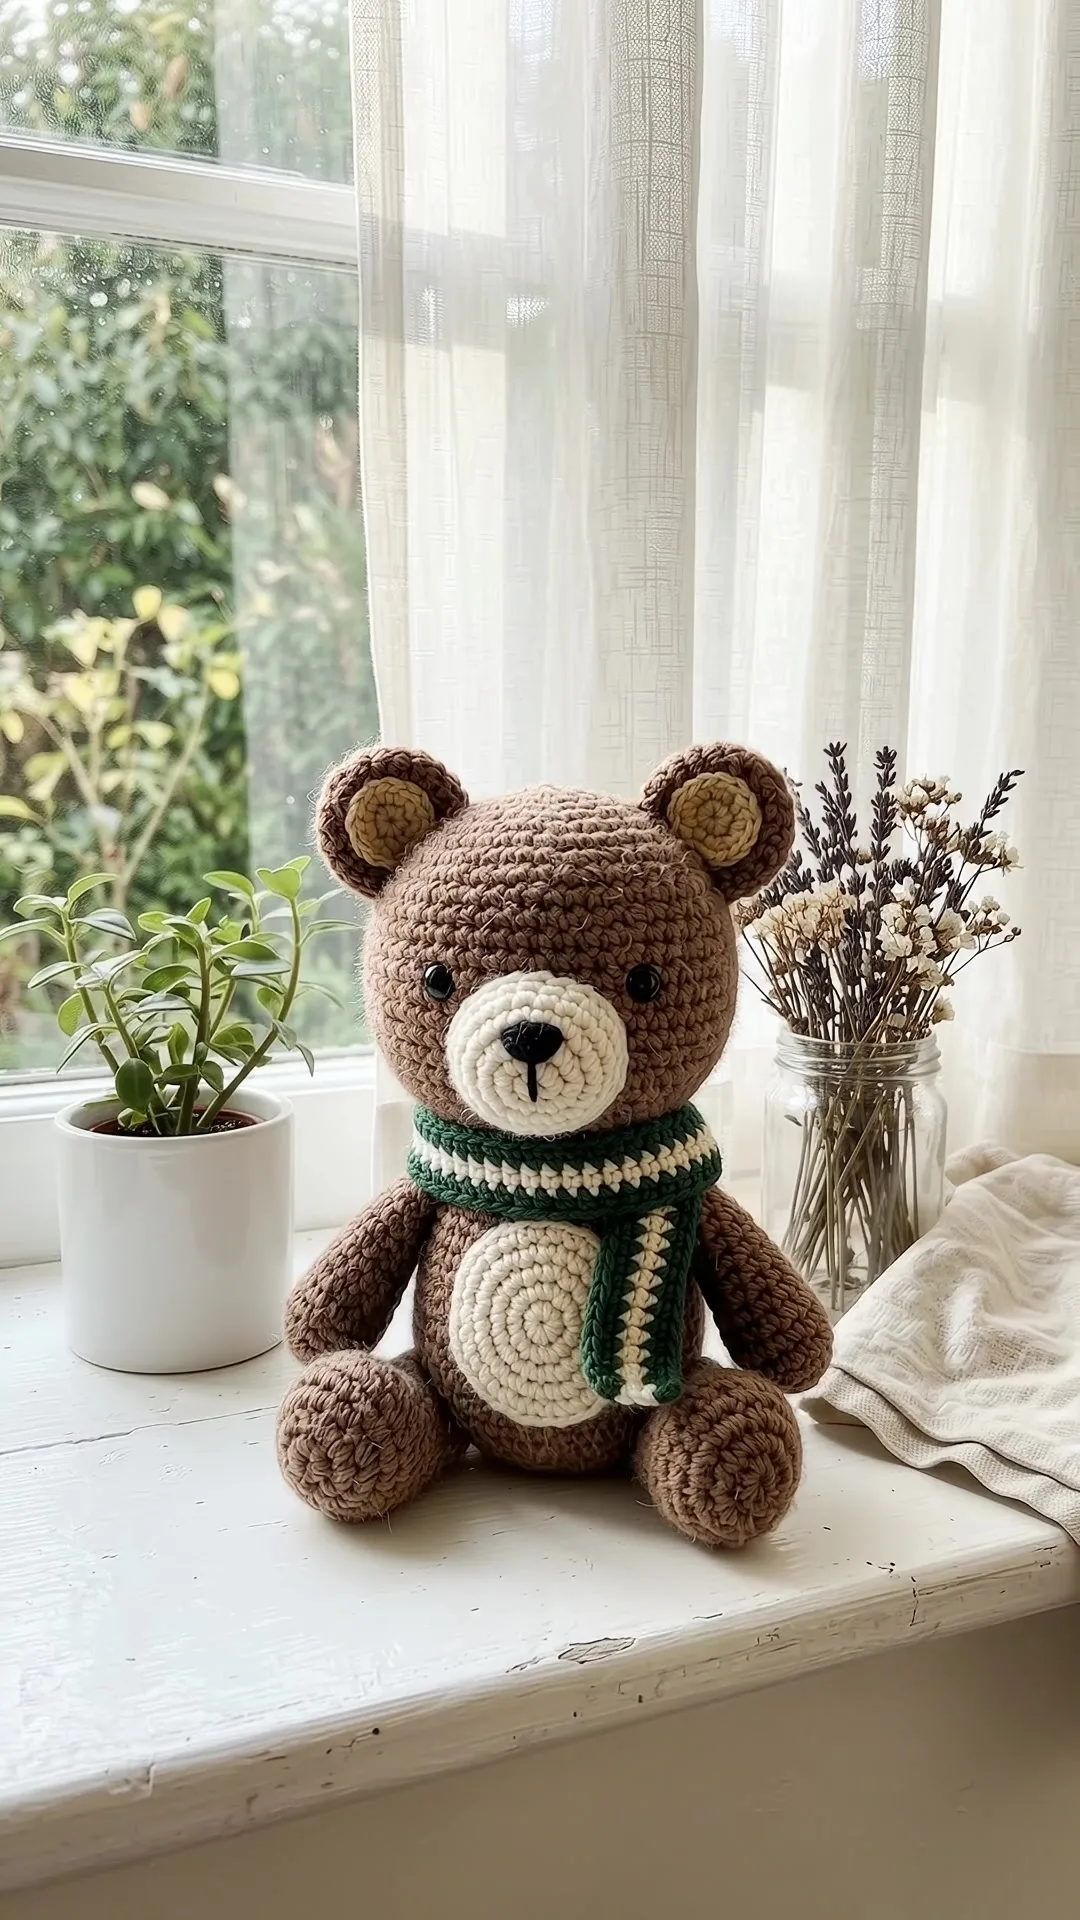
Uses sc, inc and dec worked in continuous rounds.
About 6 to 8 hours for one bear and scarf.
A soft toy for kids, cozy shelves or any fall day.
About This Cozy Bear in a Scarf Amigurumi Crochet Pattern Pattern
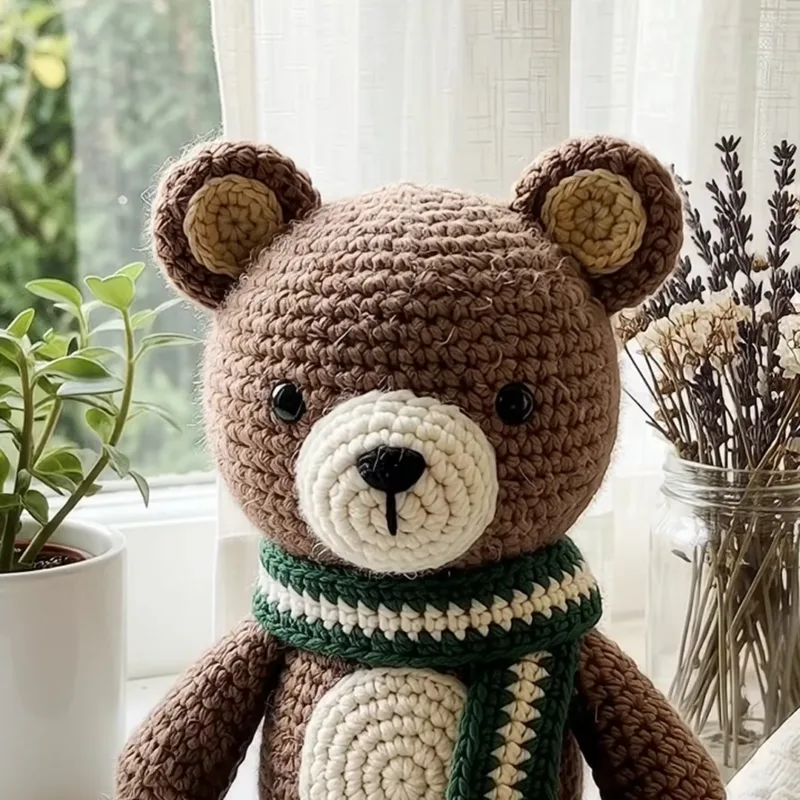
This cozy bear is a cuddly amigurumi toy with a brown body, a cream muzzle and chest, tan-lined round ears, black bead eyes and a small round tail, sitting upright in a forest green and cream striped scarf. It is about 8 inches tall when it sits, small enough to hold in one hand and big enough to hug. It is worked in continuous rounds from the head down, and the arms, legs, ears and tail are made separately and sewn on. There is no complicated shaping, only increases, decreases and plain rounds of single crochet.
If you have never made an amigurumi toy, this is a lovely first project. The pieces are small, the stitches are simple and the finished bear has so much personality that you will want to make a whole family of them. If you are an experienced maker, it is a relaxing, quick project that makes a perfect gift.
What makes this bear special
A bear is the classic cuddle toy, and this one has an extra dose of charm. The cream muzzle and the tan inside of the ears give the face a warm, friendly expression, and the round shapes make the whole toy soft and huggable. Because it is made in cotton, it holds its shape and sits up by itself on a shelf or a bed.
The scarf is my favorite detail. It is a simple striped strip that wraps around the neck, but it turns a plain toy into a cozy character. You can make it longer for a dramatic wrap, shorter for a neat little collar, or change the stripes to match a school, a team or a favorite color.
Skill level and time
This pattern is beginner friendly. You need to know how to make a magic ring, single crochet, increase, decrease, and change colors. If you have worked a few simple rounds in a spiral, you have the skills. The whole toy takes about 6 to 8 hours, which is a long weekend of casual crocheting or a few evenings in front of a show.
Here is an easy way to plan it:
- Session one: Make the head and the muzzle, about two hours.
- Session two: Make the body, arms and legs, about two hours.
- Session three: Make the ears, tail and scarf, about one hour.
- Session four: Sew everything together, embroider the face and add the final touches, about one hour.
Choosing your yarn
The pattern uses worsted weight (number four) cotton yarn. Cotton gives amigurumi very clear stitches, and it keeps its shape well once stuffed. The fabric is a little firmer than acrylic, so the toy stands up neatly and the details stay crisp. Acrylic and cotton blends also work if you want a softer, huggier toy, although they may show the stuffing more.
Here is the yarn you need, about 160 grams in total:
- Brown: about 100 grams for the head, body, arms, legs, ears and tail
- Cream: about 30 grams for the muzzle, chest and scarf stripes
- Tan: about 10 grams for the ear linings and paws
- Forest green: about 20 grams for the scarf
You will also need two 8 mm black safety eyes or small black beads, a little black thread for the nose and polyester fiberfill. If the toy is for a baby or a small child, skip the safety eyes and embroider the eyes with black yarn instead, so that nothing can be pulled off.
Tools you will need
A 3.5 mm (E) crochet hook is used in the pattern. It is smaller than the usual hook for worsted yarn, on purpose, because tight stitches stop the stuffing from showing through. You will also need a yarn needle, a stitch marker to mark the first stitch of each round, scissors and a pair of small sharp scissors for trimming. A pair of tweezers or the end of a pencil is handy for pushing the stuffing into small parts.
Gauge and size
The gauge is about five single crochet rounds to one inch. You do not need to match it exactly, but a tight, even fabric is important. If you can see the stuffing through the stitches, switch to a smaller hook. If the fabric feels stiff and is hard to work, go up half a size. The finished toy size depends on your yarn and hook, so a thinner yarn gives a smaller toy and a thicker yarn gives a bigger one.
Working in continuous rounds
Amigurumi is worked in a spiral, with no joins and no turning chains. Mark the first stitch of every round with a stitch marker and move it up as you work. When you reach the marker, you have finished the round. If you lose track, count the stitches and compare them with the number in brackets at the end of each round in the pattern.
Insert the hook under both loops of each stitch unless the pattern says otherwise, and keep a firm tension. The magic ring is the best way to start, because it can be pulled tight to leave no hole at the top. Practice it with scrap yarn if you have not used it before.
Stuffing tips
Stuffing makes or breaks an amigurumi. Stuff firmly and in small amounts, pushing the fiberfill into every corner. A toy that is under stuffed will slump and wrinkle, while an over stuffed toy will show white fiberfill between the stitches. The head should feel firm like a small ball, and the body a little softer so the toy can sit.
Stuff as you go rather than all at the end. When the opening gets small, use a pencil or a pair of tweezers to push the last bits into place. Roll the toy in your hands to smooth any lumps before you close the opening.
Making the face
The eyes go in between rounds nine and ten of the head, about six stitches apart. Before you secure them, place them with pins and check the look. Moving the eyes closer together or lower makes the face look sweeter and younger. The nose is embroidered with a few straight stitches in black thread over the muzzle.
Assembling the toy
Pin all of the pieces in place before you sew anything. Sew the head to the body first, then the ears, arms and legs, and finally the tail. Use a whip stitch around the base of each piece and go through both loops of the body, so the parts stay secure even when the toy is hugged and played with. Pull the yarn tail inside the body to hide it.
The striped scarf
The scarf is a long strip of single crochet in two alternating colors. Change colors at the end of each row, carrying the yarn up the side. Wrap the scarf around the neck and sew the ends together at the front. You can make it long enough to wrap twice for a very cozy look.
Troubleshooting common problems
If the head leans or the toy will not sit, check that the base of the body is flat and that the legs are sewn on at the same height and at the same angle. A toy that tips forward usually needs a little more stuffing in the head and a little less in the belly. If it tips backward, move the tail up slightly or add more stuffing to the legs.
If your pieces come out different sizes, you probably changed tension between sessions. Try to work all the pieces of the same kind together, such as both arms and both legs, and compare them side by side before you fasten off. If one is bigger, add or remove a round on the next piece to match.
If the fabric looks gappy, the hook is too big or your tension is too loose. Drop down half a hook size and work a little tighter. If you find it hard to insert the hook into tight stitches, use a hook with a pointed tip and work with the stitches slightly looser at the moment of insertion, then pull tight when you finish the stitch.
Caring for your amigurumi
Most handmade toys only need surface cleaning. Use a slightly damp cloth with a drop of mild soap and dab the dirty areas, then let the toy air dry in a well ventilated spot. For a deeper clean, place it in a mesh laundry bag and wash on a cold gentle cycle with mild detergent, then reshape it and let it dry for a full day. Do not tumble dry, as heat can shrink cotton and warp the shape.
If the scarf gets dirty, you can sew it on loosely or make it removable by sewing only a small tacking stitch at the front. A removable scarf is easy to wash and gives you the chance to make a second one in another color for a whole new look.
Presenting your toy as a gift
A handmade toy deserves a nice presentation. Place it in a small basket with a book, a little blanket or a small box of sweets. Tie a ribbon around the neck over the scarf, or add a handwritten tag with the name of the toy and the date it was made. If you are giving it to a child, tell the family that it is handmade and about how to wash it, so they can keep it nice for years.
Why You'll Love This Cozy Bear in a Scarf Amigurumi Crochet Pattern Pattern
This little bear is easy to love. The round ears, the cream muzzle and the cozy striped scarf make this bear look like a friend you want to hug. It has a gentle face, a soft shape and a cozy scarf, which makes it a favorite for shelves, beds and gift baskets.
It is also a quick project. Most people finish it in a few evenings, which makes it a wonderful way to use up scraps and to practice the skills you need for more advanced toys.
A gift for any age
Toys like this one make lovely gifts for baby showers, birthdays, holidays and get well presents. Adults love them too, as a desk companion or a shelf decoration. If you are making it for a small child, use embroidered eyes and check all of the seams.
Perfect for scraps
The toy uses small amounts of several colors, so it is an excellent project for leftover yarn. Even the scarf is made from scraps, so you can make a whole family of them in different colors without spending much.
Portable and relaxing
The pieces are small and easy to carry. Keep the pieces in a pouch with your hook and fiberfill and work on them while you travel, watch a movie or wait for an appointment. The continuous rounds are relaxing and repetitive in a good way.
Great for learning
This pattern is a good teacher. You practice the magic ring, increases, decreases, color changes, stuffing and sewing, all on a project that is small enough to finish quickly. By the end, you will have the skills for many other amigurumi patterns.
Switch Things Up
Once you know the basic pattern, you can change it in many ways. Here are some ideas.
Change the colors
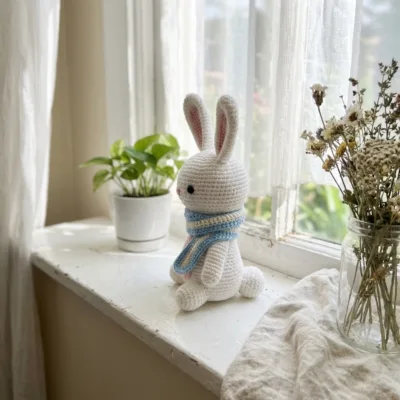
Make the bear in cream with a pink scarf for a baby shower, in dark chocolate with a red scarf for a holiday gift, or in gray with a yellow scarf for a modern look. A striped scarf in school colors makes a lovely graduation gift, and a plain red scarf gives a holiday look.
Change the size
Use a thinner yarn and a smaller hook to make a toy of about 5 inches, perfect for a keychain or an ornament. Use a chunky yarn and a larger hook to make a bigger toy of 12 inches or more, which makes a great cuddle companion. Remember to adjust the amount of fiberfill and to make the eyes bigger to match.
Add accessories
A small hat, a bow, a vest or a tiny bag can turn the bear into a whole character. Make a hat with a few simple rounds of single crochet and a pom pom on top, or a flower from a small spiral of chain stitches.
Make it a baby safe toy
For babies and young children, leave out the safety eyes and embroider them with black yarn. Sew every piece on with extra stitches, and check the toy for loose threads before you give it away. Use a washable cotton or a soft acrylic and stuff with washable fiberfill.
Make a set
Make the same pattern in several colors for a family of toys, or combine it with other animals to make a whole shelf of characters. Making a set is a lovely gift for siblings.
Materials Needed
— Main Fabric
— Tools Required
The Free Pattern
0% complete
— Head (brown) :
— Muzzle (cream) :
— Body (brown) :
— Ears (Make 2, brown and brown) :
— Arms and Legs (Make 4) :
— Tail (cream tip and brown) :
— Scarf (forest green and cream) :
Assembly Instructions
- Sew the head to the body.
- Sew the ears on top of the head, slightly apart.
- Sew the arms to the sides and the legs to the bottom.
- Sew the tail to the back.
- Wrap the scarf around the neck and sew the ends together at the front.
Common Mistakes & How to Fix Them
Using a hook that is too big. Large stitches show the stuffing, so use a smaller hook than the yarn label suggests.
Losing track of the rounds. Always use a stitch marker in the first stitch of each round and count the stitches at the end of every round.
Under stuffing. A toy that is not stuffed firmly will slump and wrinkle, so use plenty of small pieces of fiberfill.
Over stuffing. Too much stuffing stretches the stitches and shows the fiberfill through the gaps.
Placing the eyes without testing. Pin the eyes in place and look at the face before you secure them, since small changes make a big difference.
Sewing the parts on in a rush. Pin everything first and check the balance of the toy before you sew.
Leaving short tails. Keep long tails for sewing and weave in the rest well so they do not come loose.
Skipping the final shaping. Roll and squeeze the toy to smooth the stuffing before you close the last opening.

You Might Also Like
Important Notes
Use a hook one or two sizes smaller than usual so the fabric is tight.
Mark the first stitch of every round with a stitch marker.
Stuff firmly and as you go, using small amounts of fiberfill.
For babies and young children, embroider the eyes instead of using safety eyes.
Sew each part on with a secure whip stitch through both loops of the body.
Weave in all ends securely, and hide the tails inside the toy.
Spot clean the toy with a damp cloth, or wash it gently in a mesh bag on a cool cycle and air dry.
Keep the toy away from direct heat and sunlight, which can fade the colors.
I hope this cozy bear in a scarf amigurumi brings a lot of smiles. Take your time with the stuffing and the face, and do not rush the sewing, because those steps give the toy its character. A little patience at the end makes a big difference.
If you make one, I would love to see it. Share a photo and tell me who it is for. Happy hooking!
Crochet Abbreviations
You Ask, We Answer
How big is the finished toy?
The bear is about 8 inches tall when sitting, using worsted weight cotton yarn and a 3.5 mm hook. A thinner yarn makes it smaller and a thicker yarn makes it larger.
How long does it take?
Most people finish it in 6 to 8 hours, which is about four short sessions. The head and body take the longest, and the scarf and sewing are quick.
Is this a good beginner pattern?
Yes. It uses single crochet, increases, decreases and color changes in a spiral. If you can make a magic ring, you can make this toy.
How much yarn do I need?
You need about 160 grams of worsted weight cotton yarn in total, split across the colors listed in the pattern, plus fiberfill, safety eyes and black thread.
Can I use acrylic yarn?
Yes. Acrylic makes a softer toy, but it may show the stuffing more. Use a small hook and a tight tension to keep the stitches close.
Is it safe for babies?
Leave out the safety eyes and embroider the eyes with yarn, then check every seam. Always supervise small children with any handmade toy.
How do I stop the stuffing from showing?
Use a smaller hook, keep a tight tension and stuff in small amounts. If you still see gaps, choose a slightly thicker yarn.
How do I wash the toy?
Spot clean with a damp cloth for most toys. If you need to wash it, put it in a mesh bag on a gentle cold cycle and let it air dry completely.
Can I change the colors?
Of course. Keep a light color for the muzzle and the scarf stripes so the face stays clear, and test the colors together before you start.
How do I attach the pieces so they stay on?
Pin them first, then whip stitch around the base through both loops of the body and go around twice. This keeps the parts secure for hugs and play.
Can I sell toys made from this pattern?
Please check the terms on the pattern page. In general, items you make by hand are yours to enjoy, and a link back to the pattern is always appreciated when you share photos.
Success!
Thanks for subscribing — check your inbox for a welcome note.
Abbreviations
- ch — chain
- sc — single crochet
- sl st — slip stitch
- st — stitch
- inc — increase (2 sc in the same stitch)
- dec — decrease (sc 2 together)