
Grumpy Lizard Mug Coaster Amigurumi Crochet Pattern
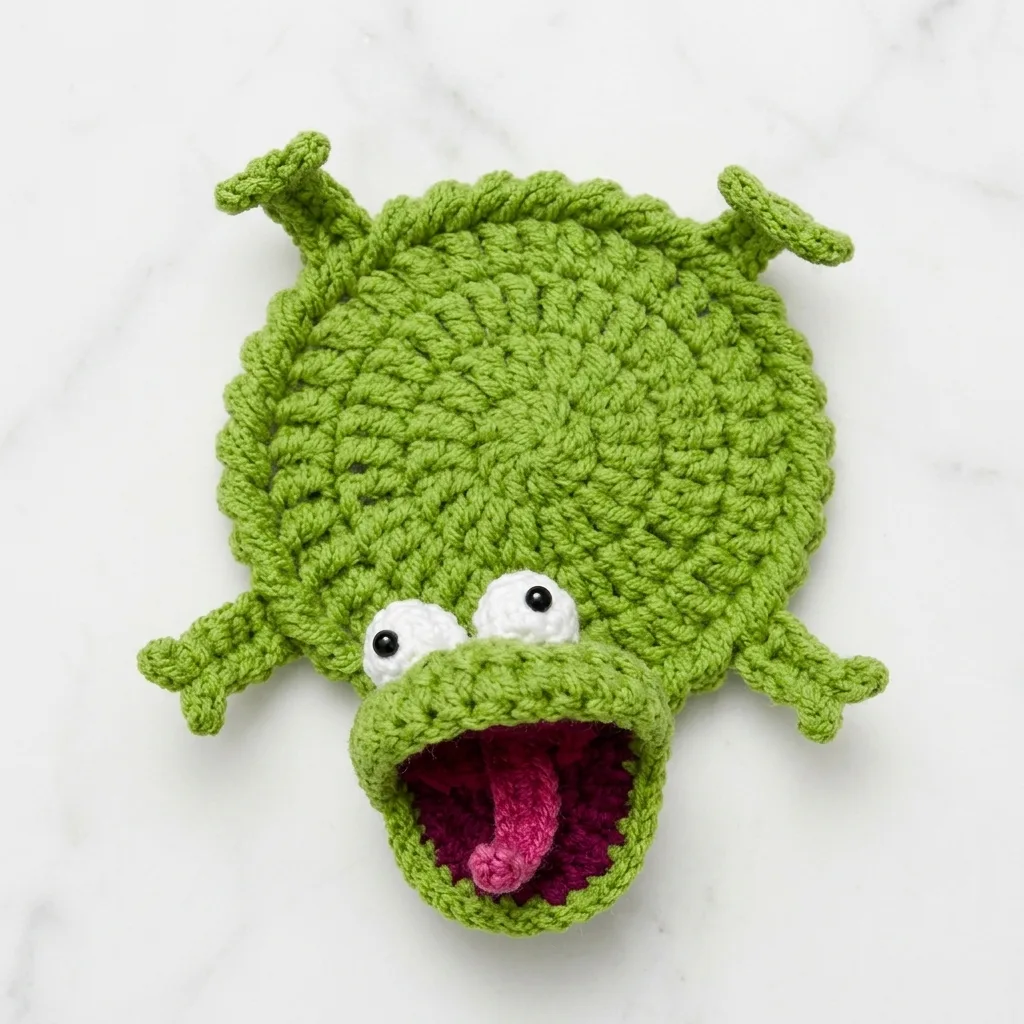
Just single crochet, increases, and decreases worked flat in the round.
A quick 4-6 hour make once your yarn and eyes are ready to go.
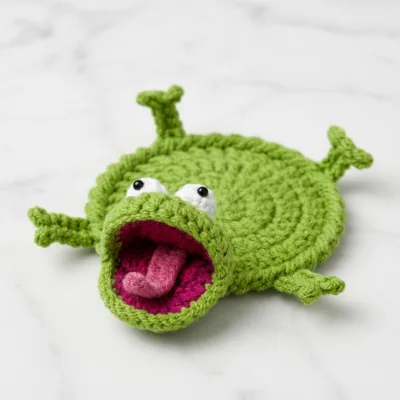
That wide-open mouth and googly eyes make everyone laugh the second it's finished.
About This Grumpy Lizard Mug Coaster Amigurumi Crochet Pattern Pattern
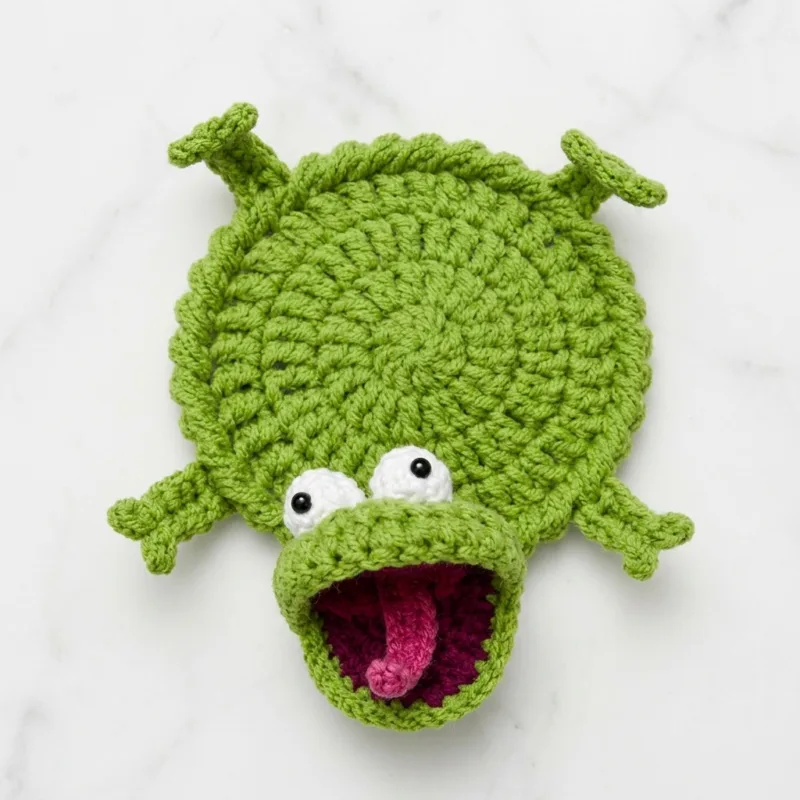
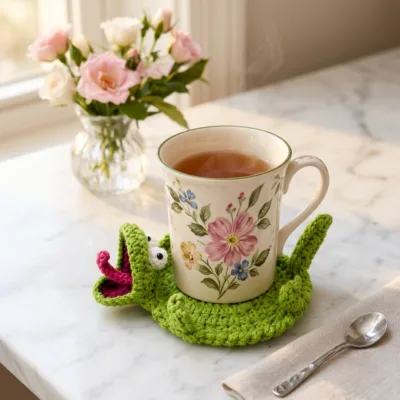
This little guy started as a doodle in my notebook of a lizard mid-yawn, and somehow he turned into my favorite coaster pattern yet. He's worked as a flat spiral base with a separate hinged mouth panel, so your mug tucks right into that open jaw and stays put.
The scrappy limbs and antennae poke out around the edges for extra charm, but they're totally optional if you want a cleaner silhouette.
Why You'll Love This Grumpy Lizard Mug Coaster Amigurumi Crochet Pattern Pattern
I love how forgiving this pattern is: the base is just single crochet increases, so any wobbles in your tension get smoothed out by the natural curve of the spiral.
And that hinged mouth is honestly the best part. It's a simple flat panel folded and sewn on, but it reads as such a clever construction trick once it's attached.
Switch Things Up
Swap the green for a soft grey and you've got a sleepy dragon instead of a lizard. You could also skip the fiberfill in the limbs entirely for a flatter, more traditional coaster feel, or double up the base rounds for a chunkier mug rug that fits oversized mugs.
Materials Needed
— Main Fabric
— Tools Required
The Free Pattern
0% complete
— Base / Body (make 1) :
— Mouth Panel (make 1) :
— Tongue (make 1) :
— Eyes (make 2) :
— Eyelid Rims (make 2) :
— Front Legs (make 2) :
— Back Legs (make 2) :
— Antennae (make 2) :
Assembly Instructions
- Weave in all loose ends except the ones you'll use for sewing pieces together.
- Position the mouth panel along one edge of the body, curving it slightly so it reads as an open jaw, and sew it in place using the mattress stitch along its top edge only, leaving the lower edge free to lift open.
- Sew the tongue into the center of the magenta mouth interior, letting the tip curl slightly outward past the edge.
- Sew the eyelid rims to the top of the body just above and behind the mouth, angled outward.
- Nestle a finished eye into each eyelid rim and stitch it in place all the way around so it can't spin.
- Sew the two antennae to the top of the head between the eyes, angled slightly apart.
- Attach the two front legs near the mouth end of the body and the two back legs near the opposite end, positioning them so the coaster still sits flat on a table.
- Steam-block the piece gently under a damp cloth if the edges are curling, then let it dry flat before use.
Common Mistakes & How to Fix Them
Sewing the mouth panel closed all the way around instead of leaving the bottom edge free — the jaw won't be able to 'open' and hold a mug.
Skipping the rim rounds (11-12) on the base, which leaves the coaster too flat and lets mugs slide right off.
Overstuffing the legs and antennae so they stand too stiffly instead of flopping naturally around the edge.
Forgetting to insert the safety eyes before closing round 5 on the eye pieces — there's no way to add them after the opening cinches shut.

You Might Also Like
Important Notes
Use a hook one size smaller than the yarn label recommends for a tight, gap-free fabric that holds its shape as a coaster.
Keep tension even but not too tight on the mouth panel edging, since it needs a little give to fold open and closed around a mug.
I hope this grumpy little guy makes your coffee table just a bit sillier. Tag me if you make one — I love seeing what colors people pick for the mouth!
Crochet Abbreviations
You Ask, We Answer
What size mug does this coaster fit?
The base comfortably holds mugs up to about 3.5 inches (9cm) in diameter. For an oversized mug, add one more increase round before starting the straight rounds.
Can I use cotton yarn instead of acrylic?
Yes, cotton is actually a great choice for coasters since it's sturdy and holds its shape well against heat and moisture — just size your hook down slightly since cotton tends to be less forgiving than acrylic.
Is this pattern good for a first amigurumi project?
Definitely. It only uses single crochet, increases, and decreases, and the small piece count makes it much less overwhelming than a full stuffed animal.
Can I skip the safety eyes for a kid-safe version?
Yes — embroider the eyes on with black yarn using a few satin stitches instead, which removes any small, swallowable parts.
Success!
Thanks for subscribing — check your inbox for a welcome note.
Abbreviations
- mr — magic ring
- ch — chain
- sc — single crochet
- inc — increase (2 sc in same stitch)
- dec — decrease (single crochet 2 stitches together)
- sl st — slip stitch
- st(s) — stitch(es)