
Christmas Elf with Dangling Legs Amigurumi Crochet Pattern
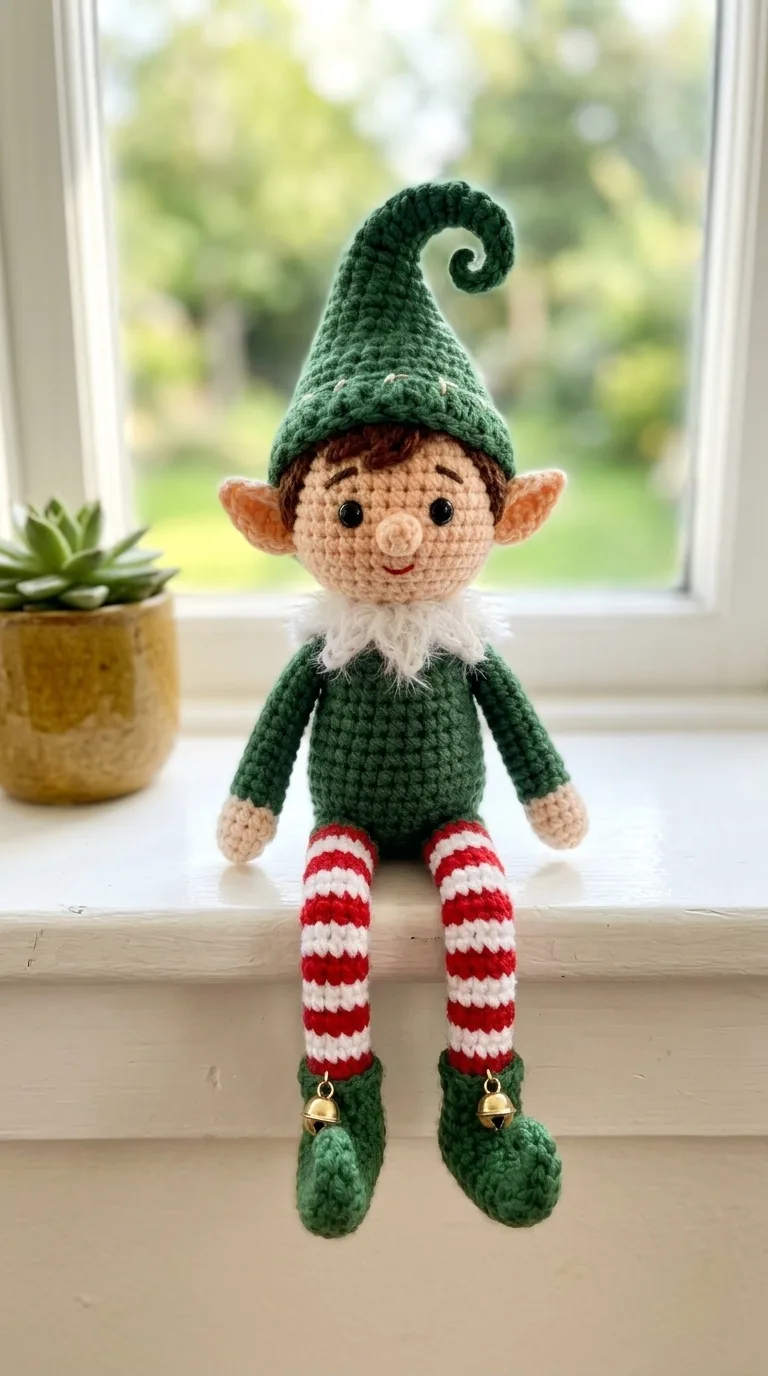
Worked in spiral rounds with sc, increases, decreases and simple color changes.
Plan for 8 to 12 hours from the first magic ring to the last bell.
Long striped legs let him dangle from a shelf, a mantel or a table edge.
About This Christmas Elf with Dangling Legs Amigurumi Crochet Pattern Pattern
This little elf sits about 10 inches tall in worsted weight yarn, and his striped legs add about 6 more inches when they dangle. He has a curled forest green hat, a peach face with safety eyes, pointed ears, a fluffy white collar and green shoes with curled toes and gold jingle bells.
You will use magic ring, sc, inc, dec and simple color changes. It suits crocheters who have already made a few amigurumi and want a festive project with a bit of personality.
Why You'll Love This Christmas Elf with Dangling Legs Amigurumi Crochet Pattern Pattern
I love how much character the long legs give him. He does not need to stand up, he just sits on the edge of a shelf and looks cheerful.
He is also a great way to use up scraps. The stripes, the brown hair and the little hands all come from small amounts of yarn, and he makes a sweet handmade Christmas gift.
Switch Things Up
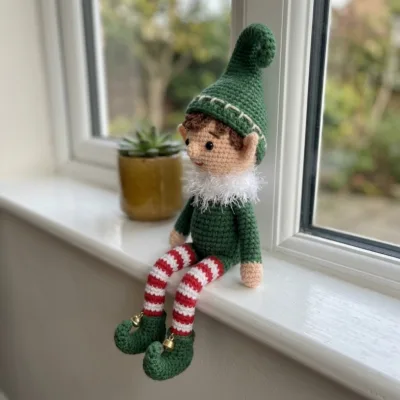
Try a red hat and a green striped leg for a different look, or use pink and white stripes for a candy cane elf. You can also make the hat tip longer for a floppier curl, add a tiny felt belt around the body, or use cotton yarn for a firmer, more textured finish.
Materials Needed
— Main Fabric
— Tools Required
The Free Pattern
0% complete
— Head (peach) :
— Nose (peach) :
— Ear (Make 2, peach) :
— Hat (green) :
— Body (green) :
— Collar (fluffy white) :
— Arm (Make 2, peach hand and green sleeve) :
— Leg and Shoe (Make 2, green shoe and striped leg) :
Assembly Instructions
- Sew the nose to the center of the face over rounds 11 and 12, directly below the eyes, stuffing it a little more if needed.
- Embroider a small smile with red floss on round 13 under the nose, and add two short brown eyebrows above the eyes on round 8.
- Sew the ears to the sides of the head over rounds 9 to 12, with the points facing up and slightly out.
- Use brown yarn to stitch short loops for the hair along the front hairline and down the sides of the face, over rounds 6 to 8, then trim the ends.
- Pin the hat to the head so the brim sits just above the hair, then sew it all the way around. Tack the curled tip in place and add small cream stitches along the brim with embroidery floss.
- Sew the body to the bottom of the head over rounds 15 to 17, then place the collar around the neck and sew it down at the join.
- Sew the top of each arm to the sides of the body at round 14, and sew the legs to the front bottom of the body over round 4, with the striped legs hanging forward.
- Sew a gold bell to the ankle of each shoe, weave in all ends and shape the curled toes.
Common Mistakes & How to Fix Them
Losing track of the first stitch in the narrow tubes for the hat tip and shoe toes. Move your stitch marker up every round and count the 6 or 4 sts often.
Making the head too lightly stuffed, which makes the hat tilt. Stuff the head firmly so it holds its shape under the hat.
Carrying the stripe yarn too tightly on the legs, which puckers the stripes. Keep the carried strand loose and check the leg lays flat.
Sewing the legs too far back, so he cannot sit forward on a shelf. Pin them to the front of the body first and test how he sits.
You Might Also Like
Important Notes
Work in continuous spiral rounds without joining, and use a stitch marker in the first stitch of every round.
Keep your tension snug so the stuffing does not show through, and do not worry about exact gauge.
The bells and safety eyes are small parts. For babies and children under 3, embroider the eyes and leave the bells off.
Always proofread the stitch counts at the end of each round before moving on.
I hope your little elf brings some Christmas cheer to your shelf. Happy hooking, and please show me yours when he is finished.
Crochet Abbreviations
You Ask, We Answer
How big is the finished elf?
He is about 10 inches tall sitting, and the legs add about 6 inches when they hang down, using worsted weight yarn and a 3.5 mm hook.
Can I use other yarn weights?
Yes. Use a smaller hook with DK yarn for a smaller elf, or a larger hook with chunky yarn for a bigger one, and keep the stitches tight so the stuffing stays hidden.
Is he safe for children and can I wash him?
Embroider the eyes and skip the bells for children under 3. Spot clean with a damp cloth, as a full wash can flatten the fluffy collar and loosen the stuffing.
Success!
Thanks for subscribing — check your inbox for a welcome note.
Abbreviations
- mr — magic ring
- sc — single crochet
- inc — increase (2 sc in the same stitch)
- dec — decrease (sc 2 sts together)
- ch — chain
- sl st — slip stitch
- st(s) — stitch(es)