Denise's Creative Corner Crochet · Kitchen
Free Crochet Patterns Handmade with Love

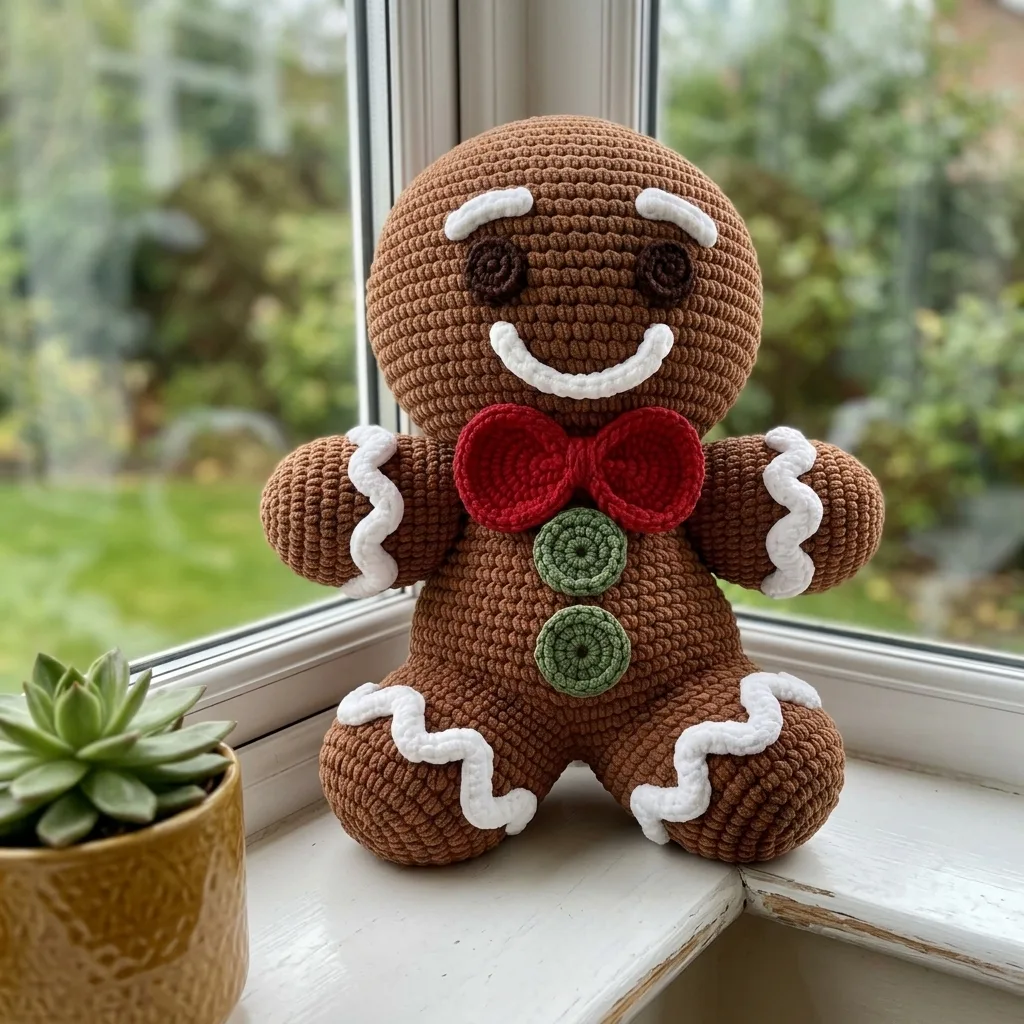
Gingerbread Man Pillow Amigurumi Crochet Pattern
Jump to Pattern
Gingerbread Man Pillow Amigurumi Crochet Pattern
14-18 Hours 10 made this
Beginner Friendly

Only sc, increases and decreases, worked in easy spiral rounds.

Cozy Weekend Make

About 14 to 18 hours from the first magic ring to the last button.

Huggable Holiday Decor

A big soft pillow that sits on a sofa or bed all through December.

About This Gingerbread Man Pillow Amigurumi Crochet Pattern Pattern

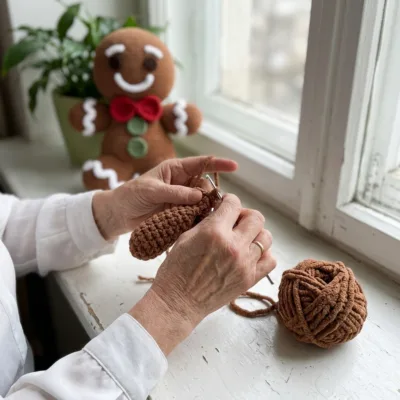
This gingerbread man pillow stands about 18 inches tall and 21 inches wide with his arms out. He is worked in chunky yarn in simple spiral rounds, then stuffed and sewn together.

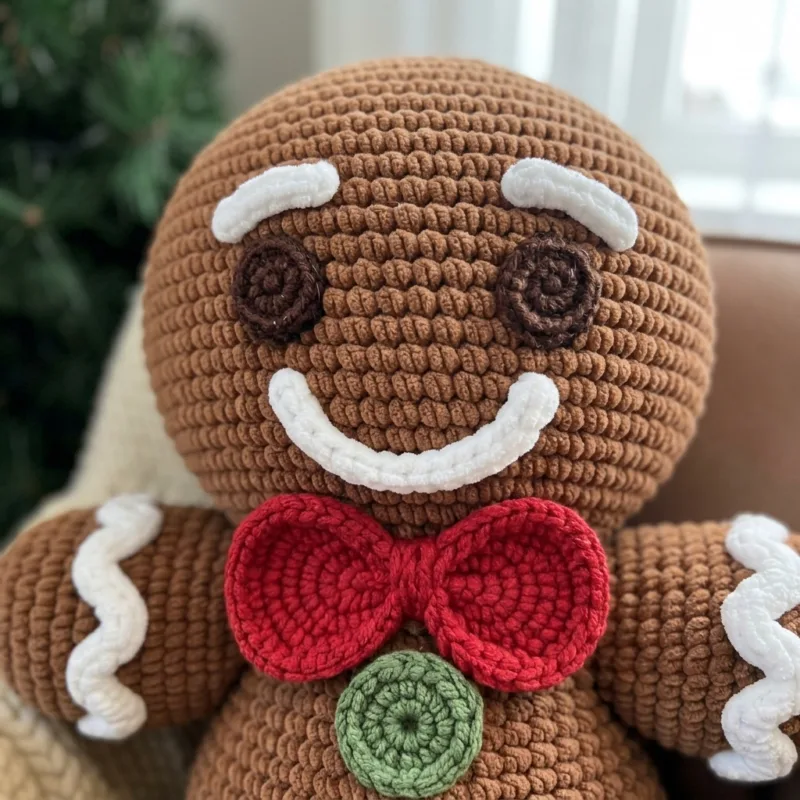
His white icing, red bow and green buttons are crocheted separately and sewn on at the end, so the whole make stays easy to follow. It suits anyone who knows how to make a magic ring and wants a bigger first amigurumi.
Gingerbread Man Pillow Amigurumi Crochet Pattern step detail

Why You'll Love This Gingerbread Man Pillow Amigurumi Crochet Pattern Pattern

I love how much character he has. The wide smile and the little eyebrows make everyone smile back at him.

He is also my favorite handmade gift for Christmas. I pile him on the sofa next to a chunky blanket and he makes the whole room feel cozy.

Switch Things Up

Try pink icing and a sparkly bow for a sweet version, or make him in pale tan for a ginger cookie look. For a smaller friend, use worsted yarn and a 3.5 mm hook. You can also swap the buttons for red and white striped ones, or add a tiny scarf instead of the bow.


Materials Needed

— Main Fabric

01 Chunky weight (#5) yarn in brown: about 250 yards (230 g)
02 Chunky weight (#5) yarn in white: about 40 yards (35 g)
03 Chunky weight (#5) yarn in red: about 25 yards (20 g)
04 Chunky weight (#5) yarn in green: about 15 yards (15 g)
05 Chunky weight (#5) yarn in dark brown: about 10 yards (10 g)
06 Polyester fiberfill: about 20 oz (570 g)

— Tools Required

07 5.0 mm (H-8) crochet hook
08 Yarn needle
09 Stitch markers
10 Scissors
11 Sewing pins

The Free Pattern

Beginner 14-18 Hours

0% complete

— Head (brown) :

Work in continuous spiral rounds without joining. Place a stitch marker in the first stitch of every round and move it up as you go.
Round 1: 6 sc in mr (6)
Round 2: inc x6 (12)
Round 3: (1 sc, inc) x6 (18)
Round 4: (2 sc, inc) x6 (24)
Round 5: (3 sc, inc) x6 (30)
Round 6: (4 sc, inc) x6 (36)
Round 7: (5 sc, inc) x6 (42)
Round 8: (6 sc, inc) x6 (48)
Round 9: (7 sc, inc) x6 (54)
Round 10: (8 sc, inc) x6 (60)
Round 11: (9 sc, inc) x6 (66)
Round 12: (10 sc, inc) x6 (72)
Round 13: (11 sc, inc) x6 (78)
Round 14: (12 sc, inc) x6 (84)
Round 15: (13 sc, inc) x6 (90)
Round 16-22: sc in each st around (90)
Round 23: (13 sc, dec) x6 (84)
Round 24: (12 sc, dec) x6 (78)
Round 25: (11 sc, dec) x6 (72)
Round 26: (10 sc, dec) x6 (66)
Start stuffing the head firmly now and keep adding stuffing as the opening gets smaller.
Round 27: (9 sc, dec) x6 (60)
Round 28: (8 sc, dec) x6 (54)
Round 29: (7 sc, dec) x6 (48)
Round 30: (6 sc, dec) x6 (42)
Round 31: (5 sc, dec) x6 (36)
Round 32: (4 sc, dec) x6 (30)
Round 33: (3 sc, dec) x6 (24)
Round 34: (2 sc, dec) x6 (18)
Round 35: (1 sc, dec) x6 (12)
Round 36: dec x6 (6)
Fasten off, leaving a short tail. Thread the tail through the front loops of the last 6 sts, pull tight and weave in the end.

— Body (brown) :

Round 1: 6 sc in mr (6)
Round 2: inc x6 (12)
Round 3: (1 sc, inc) x6 (18)
Round 4: (2 sc, inc) x6 (24)
Round 5: (3 sc, inc) x6 (30)
Round 6: (4 sc, inc) x6 (36)
Round 7: (5 sc, inc) x6 (42)
Round 8: (6 sc, inc) x6 (48)
Round 9: (7 sc, inc) x6 (54)
Round 10: (8 sc, inc) x6 (60)
Round 11: (9 sc, inc) x6 (66)
Round 12: (10 sc, inc) x6 (72)
Round 13-22: sc in each st around (72)
Round 23: (10 sc, dec) x6 (66)
Round 24: (9 sc, dec) x6 (60)
Round 25: (8 sc, dec) x6 (54)
Stuff the body firmly, pushing the stuffing into the base so he sits up on his own.
Round 26: (7 sc, dec) x6 (48)
Round 27: (6 sc, dec) x6 (42)
Round 28: (5 sc, dec) x6 (36)
Round 29: (4 sc, dec) x6 (30)
Round 30: (3 sc, dec) x6 (24)
Round 31: (2 sc, dec) x6 (18)
Round 32: (1 sc, dec) x6 (12)
Round 33: dec x6 (6)
Fasten off, add the last of the stuffing, close the hole with the tail and weave in the end.

— Arm (Make 2, brown) :

Round 1: 6 sc in mr (6)
Round 2: inc x6 (12)
Round 3: (1 sc, inc) x6 (18)
Round 4: (2 sc, inc) x6 (24)
Round 5: (3 sc, inc) x6 (30)
Round 6-12: sc in each st around (30)
Round 13: (3 sc, dec) x6 (24)
Stuff the arm firmly.
Round 14: (2 sc, dec) x6 (18)
Round 15: (1 sc, dec) x6 (12)
Round 16: dec x6 (6)
Fasten off, leaving a 16 inch tail for sewing. Close the hole and keep the tail.

— Leg (Make 2, brown) :

Round 1: 6 sc in mr (6)
Round 2: inc x6 (12)
Round 3: (1 sc, inc) x6 (18)
Round 4: (2 sc, inc) x6 (24)
Round 5: (3 sc, inc) x6 (30)
Round 6: (4 sc, inc) x6 (36)
Round 7: (5 sc, inc) x6 (42)
Round 8-15: sc in each st around (42)
Round 16: (5 sc, dec) x6 (36)
Stuff the leg firmly.
Round 17: (4 sc, dec) x6 (30)
Round 18: (3 sc, dec) x6 (24)
Round 19: (2 sc, dec) x6 (18)
Round 20: (1 sc, dec) x6 (12)
Round 21: dec x6 (6)
Fasten off, leaving a 16 inch tail for sewing. Close the hole and keep the tail.

— Icing Zigzag (Make 4, white) :

Row 1: ch 31, sc in the 2nd ch from the hook and in each ch across (30)
Row 2: ch 1, turn, sc in each st across (30)
Fasten off, leaving a long tail. Make 4: one for the end of each arm and one for the end of each foot. You will bend each strip into a zigzag when you sew it on.

— Smile (Make 1, white) :

Row 1: ch 21, sc in the 2nd ch from the hook and in each ch across (20)
Row 2: ch 1, turn, sc in each st across (20)
Fasten off, leaving a long tail for sewing the smile in a curve.

— Eyebrow (Make 2, white) :

Row 1: ch 9, sc in the 2nd ch from the hook and in each ch across (8)
Row 2: ch 1, turn, sc in each st across (8)
Fasten off, leaving a long tail for sewing.

— Eye (Make 2, dark brown) :

Round 1: 6 sc in mr (6)
Round 2: inc x6 (12)
Round 3: (1 sc, inc) x6 (18)
Join with a sl st to the first sc, fasten off and leave a long tail for sewing. The eyes are crocheted, so there are no safety eyes.

— Bow Loop (Make 2, red) :

Row 1: ch 16, sc in the 2nd ch from the hook and in each ch across (15)
Row 2-9: ch 1, turn, sc in each st across (15)
Fasten off, leaving a long tail. Fold each rectangle in half and sew the short ends together to make a loop.

— Bow Knot (Make 1, red) :

Row 1: ch 6, sc in the 2nd ch from the hook and in each ch across (5)
Row 2-6: ch 1, turn, sc in each st across (5)
Fasten off. Place the two loops side by side, wrap this strip around the middle and sew the ends together at the back to form the bow.

— Button (Make 2, green) :

Round 1: 6 sc in mr (6)
Round 2: inc x6 (12)
Round 3: (1 sc, inc) x6 (18)
Round 4: (2 sc, inc) x6 (24)
Join with a sl st to the first sc, fasten off and leave a long tail for sewing. You can work Round 4 in the back loops only for a pretty ridge.

Assembly Instructions

  1. Pin the head on top of the body, lining up Rounds 29 to 36 of the head with Rounds 28 to 33 of the body, then sew all the way around with whipstitch.
  2. Sew the arms to the sides of the body at Rounds 24 to 28, tilting them slightly upward, using the long tails.
  3. Sew the legs to the bottom of the body at Rounds 3 to 8, pointing them forward and slightly apart so he sits on the sofa.
  4. Sew the eyes to the head at Round 18, about 18 sts apart, and sew an eyebrow above each eye at Round 14.
  5. Sew the smile in a curve across the lower face between Rounds 23 and 27, using the long tail.
  6. Sew an icing zigzag across the end of each arm and each foot, bending it into a wavy line as you stitch.
  7. Sew the bow at the neck where the head meets the body, then sew the two green buttons down the front of the body, one under the other.
  8. Weave in all the ends and tidy any loose fibers.

Common Mistakes & How to Fix Them

Losing track of the first stitch makes the rounds drift, so move your stitch marker up at the end of every round.

Stuffing too lightly gives you a floppy pillow, so push in the fiberfill in small handfuls until each piece feels firm.

Sewing the arms too low stops him from sitting up, so pin both arms in place and check them from the front before you stitch.

Pulling the icing strips straight looks stiff, so bend them into a wavy line and pin them before sewing.


Denise photo
Denise

Denise designs cozy amigurumi and home decor crochet patterns with simple stitches and clear instructions.


Important Notes

Work in continuous spiral rounds without joining and keep your tension tight so the stuffing does not show through.

Gauge does not need to be exact, but a firm stitch gives the best shape. Use a smaller hook if you can see the stuffing.

The eyes, icing and buttons are all sewn on, with no safety eyes, so he can be a cuddly gift. Check that every piece is stitched on firmly before giving him to a small child.

Spot clean with a damp cloth, or hand wash gently and let him dry flat.


I hope your gingerbread man brings as much cheer to your home as mine does. Take it one piece at a time and share a photo when he is ready for his spot on the sofa.

Crochet Abbreviations

01 mr — magic ring
02 sc — single crochet
03 inc — increase (2 sc in the same stitch)
04 dec — decrease (single crochet 2 stitches together)
05 ch — chain
06 sl st — slip stitch
07 st — stitch
08 sts — stitches

You Ask, We Answer

How big is the finished gingerbread man pillow?

He stands about 18 inches tall and 21 inches wide with his arms out when made in chunky yarn with a 5.0 mm hook.

Can I use a different yarn weight?

Yes. Worsted yarn and a 3.5 mm hook make a smaller version of about 10 inches. Use the same pattern and the same stitch counts.

Is it safe for children and how do I wash it?

There are no safety eyes, but small parts are sewn on, so check them for little ones. Spot clean with a damp cloth or hand wash gently and dry flat.