
Lavender Daisy Table Runner Crochet Pattern

Uses sc, hdc, dc and simple colorwork in joined motifs.
About 20 to 25 hours for a 48 inch runner.
A calm garden look for the table.
About This Lavender Daisy Table Runner Crochet Pattern Pattern
The Lavender Daisy Table Runner is a long, elegant table runner built from a row of daisy flower motifs set on a sage green background and finished with a scalloped border. Each daisy has a golden yellow center and rings of white and lavender petals, so the runner looks like a row of garden daisies resting on a bed of leaves. The finished runner measures about 14 inches wide and 48 inches long, which is the right length for most dining tables and also works on a console, a sideboard or a long kitchen island.
The design looks like something from a boutique, yet it is made from simple stitches. You only need chain, slip stitch, single crochet, half double crochet and double crochet, plus basic color changes. Each motif is worked separately in the round, so you can make one while watching television, waiting for an appointment or sitting in the car. When you have six, you join them in a row and add the border.
What makes this runner special
Daisies are the happiest flower in the garden, and lavender gives them a gentler, more grown up look. Sage green is a calm, earthy background that makes the white petals and the purple rings stand out, while the golden yellow centers add a small spark of warmth. Together the colors feel like a country garden in early summer.
The second thing I love is how flexible the design is. Six motifs make a runner of about 48 inches. Four motifs make a shorter 32 inch runner for a small table, and eight motifs give you a long statement runner for a big gathering. Because the motif is a self contained unit, you can scale the project up or down without redoing any math.
Skill level and time
This pattern is rated intermediate. You need to be comfortable with working in the round from a magic ring, changing colors at the end of a round, and counting your stitches as you go. If you have made a few granny squares or a simple doily, you have the skills. The project takes about 20 to 25 hours in total. That sounds like a lot, but it breaks into small pieces of about three to four hours each.
Here is a relaxed schedule that works well:
- Week one: Make the six motifs. Each one takes roughly one hour once you have the rhythm.
- Week two: Work the two background rounds around every motif and block the squares.
- Week three: Join the squares into one long row and crochet the scalloped border.
- Week four: Weave in the ends, steam block the whole runner and style it on the table.
Choosing your yarn
The pattern is written for worsted weight (number four) cotton yarn. Cotton is the best choice for a table runner for three reasons. It lies flat, so the runner does not curl at the edges. It has excellent stitch definition, so the rings of each motif stay crisp. And it is washable, which matters for a piece that will meet the occasional spill.
Mercerized cotton has a light sheen that makes the colors look richer, while plain cotton has a softer, matte look. Both work well. Avoid fuzzy or very stretchy yarns, because they blur the rings and can make the runner wavy. If you want to use acrylic, choose a smooth one and block it carefully.
Plan on about 530 grams of yarn in total, using these amounts:
- Sage green: about 250 grams for the background and joining
- White: about 100 grams for the petal rings
- Lavender: about 120 grams for the rings and border
- Cream: about 40 grams for the border
- Golden yellow: about 20 grams for the centers
Buy all of each color at the same time so that the dye lots match. Even a small difference in dye lot can show in a long, flat piece like a runner, especially in a pale background color. If you are unsure, buy one extra ball of the sage green yarn, since it is used for every background square and the joining.
Tools you will need
A 4.0 mm (G) hook is used in the pattern. Choose a hook that feels comfortable, because you will be making small, tight rounds. You will also need a yarn needle for weaving in ends and joining, sharp scissors, a handful of stitch markers, and a blocking mat with rust proof pins. A small tape measure is useful for checking the size of your first motif.
Gauge and motif size
Before you commit to all six motifs, make one and measure it. Lay it flat and compare it with the dimensions in the pattern. If your motif is noticeably smaller, go up half a hook size. If it is larger or the fabric feels loose and floppy, go down half a hook size. Cotton relaxes a little after blocking, so measure again after you steam it, and keep that first motif as a size reference for the rest.
Tension is the quiet hero of a table runner. If your tension changes from one motif to the next, the runner will show it as slightly different widths. Try to crochet in the same place and the same mood, with the same hook, for the best consistency.
Working the motifs
Every motif starts with a magic ring, which gives a tight center with no hole. If the magic ring is new to you, practice it with scrap yarn first. Pull the tail firmly after the first round and weave it in on the back. Change colors at the end of each round by pulling the new color through the last loop of the final stitch, so the join is almost invisible.
Keep the color order the same in every motif. It helps to write the order on a sticky note and place it on your project bag. If you work all six motifs at the same time, doing round one on all of them, then round two on all of them and so on, you will find that your tension stays more even and the colors flow more quickly.
Count the stitches at the end of every round. The stitch counts in the pattern are there to help you, and a miscount in round three becomes a wavy edge by round five. Stitch markers in the first stitch of each round make counting faster.
Adding the background rounds
The two background rounds turn the round motif into a square and give the runner its clean, structured look. Work the corners carefully, placing two double crochet, a chain two space and two double crochet in each corner. The corners should be crisp and the sides straight. If the corners cup, your corner spaces are a little tight, so chain loosely there. If the sides bow outward, you have too many stitches along the side, so recount.
Joining the squares
Lay all six squares in a row and check the orientation of every motif before you join anything. Whipstitch the squares together on the back using the sage green yarn, working through the back loops only. Keep your stitches loose and even, and match the stitches of the two squares one to one. A seam that is too tight will pull the runner into a slight hourglass shape. After joining, weave in every end.
The scalloped border
The border has two rounds. The first is a round of single crochet that works evenly around the whole runner with three single crochet in each corner. The second makes the scallops with groups of five double crochet separated by slip stitches. The scallops give the runner a soft, finished edge that echoes the round shapes of the motifs. Work the border a little loosely, because a tight border will pull the long sides in and make the runner look narrower in the middle.
Blocking for a professional finish
Blocking is the step that takes a runner from homemade to boutique quality. Pin the finished runner flat to a blocking mat, shaping the scallops and squaring the corners, then steam it gently without letting the iron touch the yarn. Let it dry completely before you move it. Blocking opens the stitches, evens out small differences in tension and makes the rings of the motifs sit perfectly flat.
Styling the runner
Lay the runner down the center of the table with a few white candles and a small jar of fresh daisies or dried lavender. White or pale gray plates and wooden serving boards suit the soft colors, and a linen napkin in cream finishes the look. It works beautifully for spring brunches, garden parties and everyday family meals.

Why You'll Love This Lavender Daisy Table Runner Crochet Pattern Pattern
It is easy to fall in love with this runner. The sage green with white and lavender daisies feels calm, fresh and handmade, like a table set in a cottage garden. It lifts a plain table and makes everyday meals feel a little more special, and it looks just as good on a sideboard or a dresser as it does on the dining table.
It is also a project that gives you a lot back for the effort. The first motif is finished in about an hour, which is a satisfying little win, and by the time you have made three you can already picture how the finished runner will look. The pattern relies on color and repetition rather than difficult stitches, so the result looks far more complicated than it is.
A gift people treasure
A handmade table runner is a gift that people actually use. It suits a housewarming, a wedding, a mother's day present, a thank you for a host, or a treat for yourself. Because lavender and daisies are loved by so many people, this runner makes a lovely gift for a new home, a birthday or a friend who loves gardening. Because the project is made of small motifs, it is also easy to make as a group, with each friend making one motif for a shared gift.
Portable and relaxing
The motifs are small, so the project fits in a tote bag with a couple of yarn balls and a hook. You can crochet one motif during a short trip and finish the border at home. Many crocheters find that repeating a simple round again and again is calming, a kind of meditation with a beautiful result at the end.
Good for using up yarn
Each motif only uses small amounts of the accent colors, so this runner is a good way to use leftover cotton yarn. If you already have half used balls in your stash, you may only need to buy the sage green background. A slightly different shade in one ring will go unnoticed, and gives the runner a handmade charm.
Durable and practical
Cotton wears well. It can handle the weight of dishes and the occasional spill, and it can be washed gently and reshaped. The tightly worked rounds hold their shape, so the runner stays flat on the table month after month.
Switch Things Up
Once you know the basic motif, it is easy to make the pattern your own. Here are some ideas for changing the runner to suit your home and your style.
Change the colors
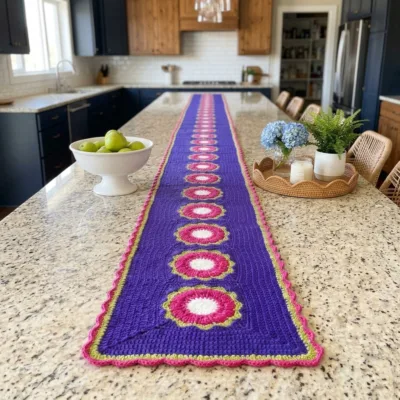
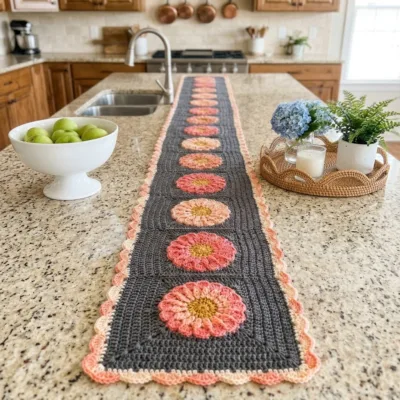
For a sunny look, make the daisies in white and butter yellow on a soft blue background. For a bolder version, use hot pink and white daisies on charcoal. If you like a quieter look, keep the same color order but replace the brightest ring with a soft neutral. If you want a bolder look, add a thin outline round in black or navy just before the background rounds.
Change the length
The runner is written for 6 motifs, but you can change the count to fit your table. Use these rough guides:
- Short runner or centerpiece mat: 3 motifs, about 24 inches long.
- Small table runner: 4 motifs, about 32 inches long.
- Standard runner: 6 motifs, about 48 inches long, as written.
- Long dining table runner: 8 motifs, about 64 inches long.
Remember to buy extra yarn when you add motifs. As a guide, each extra motif uses about 88 grams of yarn across all colors.
Try a different border
The scalloped border is the classic finish, but you can also use a simple row of single crochet for a clean, modern look. A picot edge adds a delicate, lacy feel. A row of small tassels or pom poms at each short end gives the runner a playful look for the holidays.
Use a different yarn
A thinner cotton in sport or DK weight will give you a more delicate runner with smaller motifs. You will need to make more rounds or use more motifs to reach the same length, and your gauge will be different, so make a swatch first. A thicker yarn will produce a chunkier, faster runner, but the details of the rings will be less sharp.
Turn motifs into other projects
The same motif makes a lovely coaster, a trivet or a set of placemats. One motif with the background rounds makes a small mat for a candle, and four joined together make a cushion front. If you have leftover motifs, sew them to a tote bag or a plain pillow cover for a quick matching accessory.
Materials Needed
— Main Fabric
— Tools Required
The Free Pattern
0% complete
— Daisy Motif (Make 6) :
— Sage green Background Squares :
— Joining :
— Scalloped Border :
Assembly Instructions
- Block the runner flat to the final size.
- Weave in all ends with a yarn needle.
- Steam lightly and let it dry flat.
Common Mistakes & How to Fix Them
Skipping the magic ring practice. A loose center leaves a hole in the middle of each motif, so pull the tail firmly after round one.
Changing tension between motifs. Crochet the motifs in the same sitting when you can, and measure each one against your first.
Miscounting a round. A single extra stitch in round three becomes a ruffle by round five, so count at the end of every round.
Mixing dye lots. Slight differences in the sage green yarn show on a long, flat runner, so buy all of that color at once.
Joining with tight seams. A tight seam pulls the runner into an hourglass shape, so keep the joining stitches loose.
Working the border too tightly. A tight border draws the long edges inward, so use a loose tension for the scallops.
Skipping blocking. The rings may curl and the corners may cup without blocking, and it is the step that gives the polished look.
Leaving the ends for later. With six color changes in each motif, weave in as you go to avoid a pile of ends at the end.
You Might Also Like


Important Notes
Check that your first motif matches the size in the pattern before making all six.
Use cotton yarn so the runner lies flat on the table.
Keep the same color order in every motif.
Buy all of each color at the same time to match dye lots.
Weave in your ends securely, splitting the strands and weaving in two directions so they do not work loose in the wash.
Hand wash in cool water, reshape the runner and lay it flat to dry.
Test a hidden corner for colorfastness before the first wash, since deep or bright dyes can bleed.
Store the runner flat or loosely rolled around a tube, away from direct sunlight.
I hope this lavender daisy table runner brings beauty to your table and a lot of enjoyment to your crochet hours. Take it one motif at a time, enjoy watching the rings grow and do not skip the blocking at the end. It is the step that makes the whole runner shine.
If you make it, I would love to see your colors and your table. Share a photo and tell me how long it took you. Happy hooking!
Crochet Abbreviations
You Ask, We Answer
How big is the finished runner?
The runner as written measures about 14 inches wide and 48 inches long, made from 6 motifs joined in a row with a scalloped border. You can make it shorter or longer by changing the number of motifs.
How long does it take to make?
Most people need about 20 to 25 hours in total. Each motif takes about an hour, the background rounds take a little over an hour per square, and the joining and border take a few more hours.
Is this pattern good for beginners?
It is rated intermediate because of the magic ring, color changes and stitch counts. If you have made a few granny squares and are comfortable counting stitches, you can do it. Take your time with the first motif.
How much yarn do I need?
Plan on about 530 grams of worsted weight cotton yarn in total, split across the colors listed in the pattern. Buy a little extra of the sage green background color, since it is used in every square and in the joining.
Can I use acrylic or another yarn?
You can, but cotton gives the flattest and crispest result. If you use acrylic, choose a smooth worsted weight, make a swatch, and block the runner carefully so it lies flat.
How do I wash the runner?
Hand wash gently in cool water, press out the water in a towel, reshape the scallops and lay it flat to dry. Avoid high heat and wringing. Wash on its own the first time in case the dyes release color.
Can I change the colors?
Yes. Keep the same order of light and dark rings so the motif keeps its shape, and lay the yarns together in daylight before you start. Test one motif before making all six.
How do I stop the motifs from curling?
Block them. Pin each motif flat, steam it lightly without touching the yarn and let it dry. Curling usually means the tension is a little tight, so try a half size larger hook for the outer rounds.
What is the best way to join the squares?
The pattern uses a whipstitch worked through the back loops only with the sage green yarn. Keep the stitches loose and match the stitches of both squares one to one for a flat seam.
Can I make a shorter or longer runner?
Yes. Four motifs make a runner of about 32 inches and eight motifs make about 64 inches. Each extra motif adds about 8 inches and uses a proportional amount of yarn.
Can I sell items made from this pattern?
Please check the terms on the pattern page. In general, items you make by hand are yours to enjoy, and if you share photos online, a link back to the pattern is always appreciated.
Success!
Thanks for subscribing — check your inbox for a welcome note.
Abbreviations
- ch — chain
- sc — single crochet
- sl st — slip stitch
- st — stitch
- dc — double crochet
- hdc — half double crochet