
Snowman Christmas Table Runner Crochet Pattern
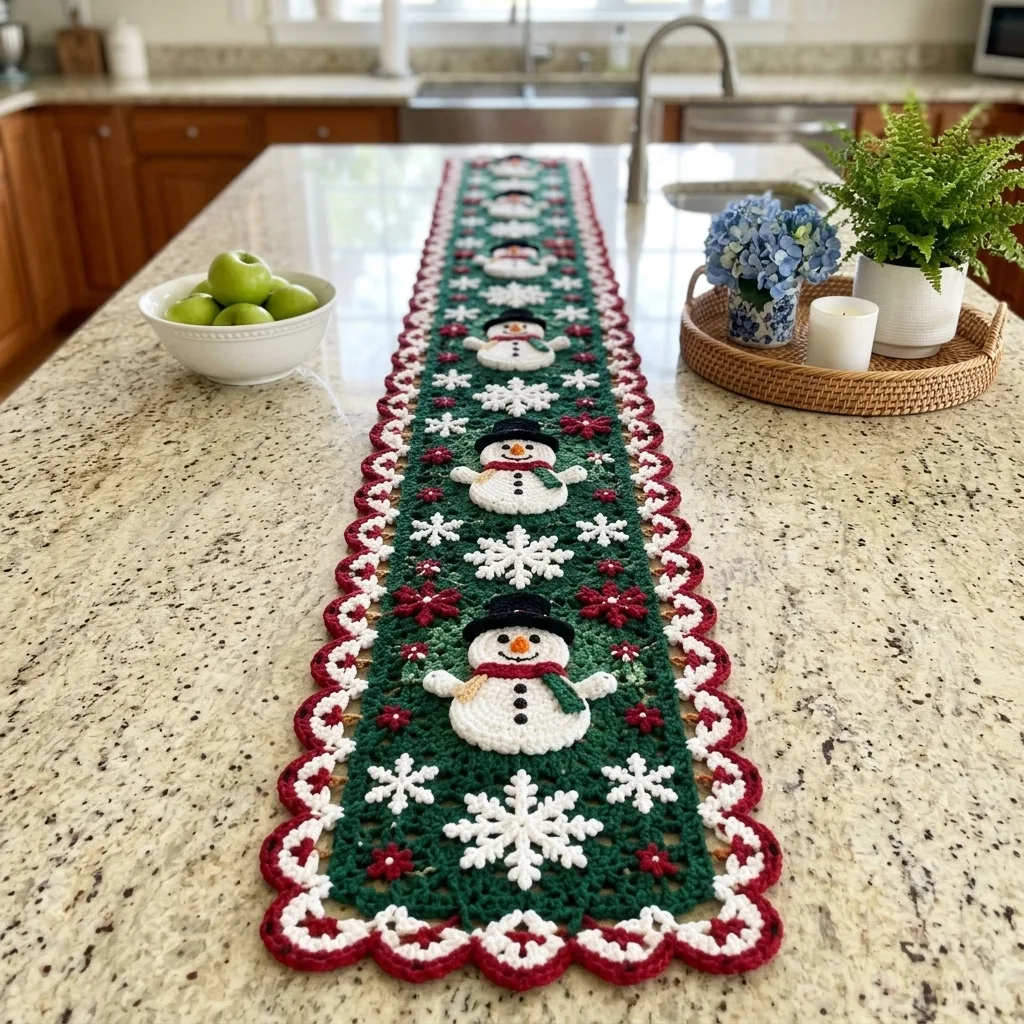
Uses sc, dc, increases, small appliques and a scalloped border.
About 25 to 30 hours for the full table-long runner.
Four smiling snowmen on a deep green background that brightens a holiday table.
About This Snowman Christmas Table Runner Crochet Pattern Pattern
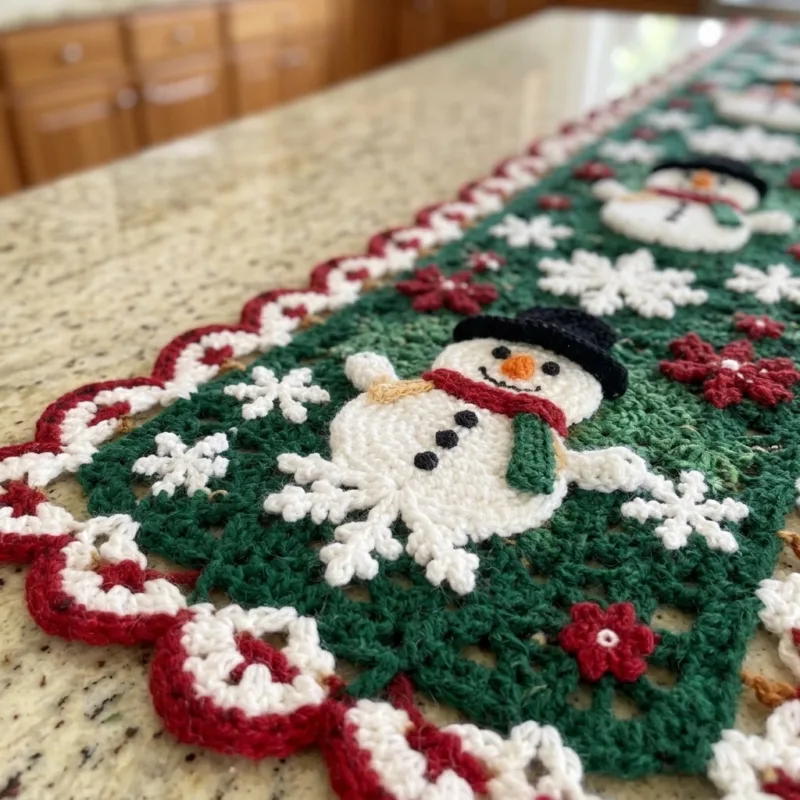
This Christmas runner is about 8 inches wide and 48 inches long before the border. It is made from five green panels, with four snowmen, snowflakes and red flowers stitched on top, then finished with a red and white scalloped edge.
You only need single crochet, double crochet, increases and slip stitches. The motifs are small, so it is a nice project to pick up a little at a time.
Why You'll Love This Snowman Christmas Table Runner Crochet Pattern Pattern
I made this runner for my own table and the snowmen make me smile every morning. The green panels make the white and red motifs stand out so much.
Each snowman has its own little scarf, and no two end up exactly alike, which I love.
Switch Things Up
Try navy panels with silver snowflakes for a cool winter look, or cream panels with red snowmen for a country feel. You can make only two panels for a shorter runner or a long hallway piece with eight. Swap the red flowers for small pom poms if you want extra texture.
Materials Needed
— Main Fabric
— Tools Required
The Free Pattern
0% complete
— Green Panel (Make 5) :
— Snowman (Make 4) :
— Snowflake (Make 10) :
— Red Flower (Make 10) :
— Scalloped Border :
Assembly Instructions
- Block the five green panels flat and lay them end to end in a row with the right sides up.
- Join the panels with a row of sc along each short edge, working through both loops of both pieces, so the runner measures about 8 inches by 48 inches.
- Sew one snowman in the center of each of the first four green panels, using the long tails and a few pins to hold them in place.
- Sew two snowflakes and two red flowers around each of the five panels, leaving a little green space between the motifs.
- Embroider the snowman faces and buttons last so the stitches stay neat.
- Work the three rounds of the scalloped border around the whole runner, starting in any corner.
- Weave in every end, steam block the finished runner and let it dry flat.
Common Mistakes & How to Fix Them
Skipping the ch 3 at the start of dc rows, which makes the sides curve in; always count 36 dc at the end of each row.
Sewing the snowmen on before the panels are joined, which shifts the motifs; join first, then place everything with pins.
Pulling the border too tight on the long sides, which makes the runner curl; use a hook one size larger for Round 1 if needed.
Making each snowman hat a different height; count the 5 rows of the crown on every hat.

You Might Also Like
Important Notes
Gauge does not have to be exact, but your runner will be longer or shorter if your stitches are looser or tighter, so adjust the number of panels.
Block every piece before assembling so the edges lie flat and the border fits evenly.
Wash gently by hand in cool water and dry flat, and avoid wringing the snowmen.
I hope this snowman runner makes your holiday table feel cozy. Happy hooking!
Crochet Abbreviations
You Ask, We Answer
How big is the finished runner?
About 8 inches wide and 48 inches long before the border, and a little larger after it.
Can I use a different yarn weight?
Yes, use a hook that suits your yarn, and expect the size to change. Worsted weight will give a wider, longer runner.
How do I wash it?
Hand wash in cool water with mild soap, press out the water with a towel and dry flat. Never put the snowmen in a hot dryer.
Success!
Thanks for subscribing — check your inbox for a welcome note.
Abbreviations
- ch — chain
- sl st — slip stitch
- mr — magic ring
- sc — single crochet
- hdc — half double crochet
- dc — double crochet
- inc — increase (2 sc in the same stitch)
- st(s) — stitch(es)