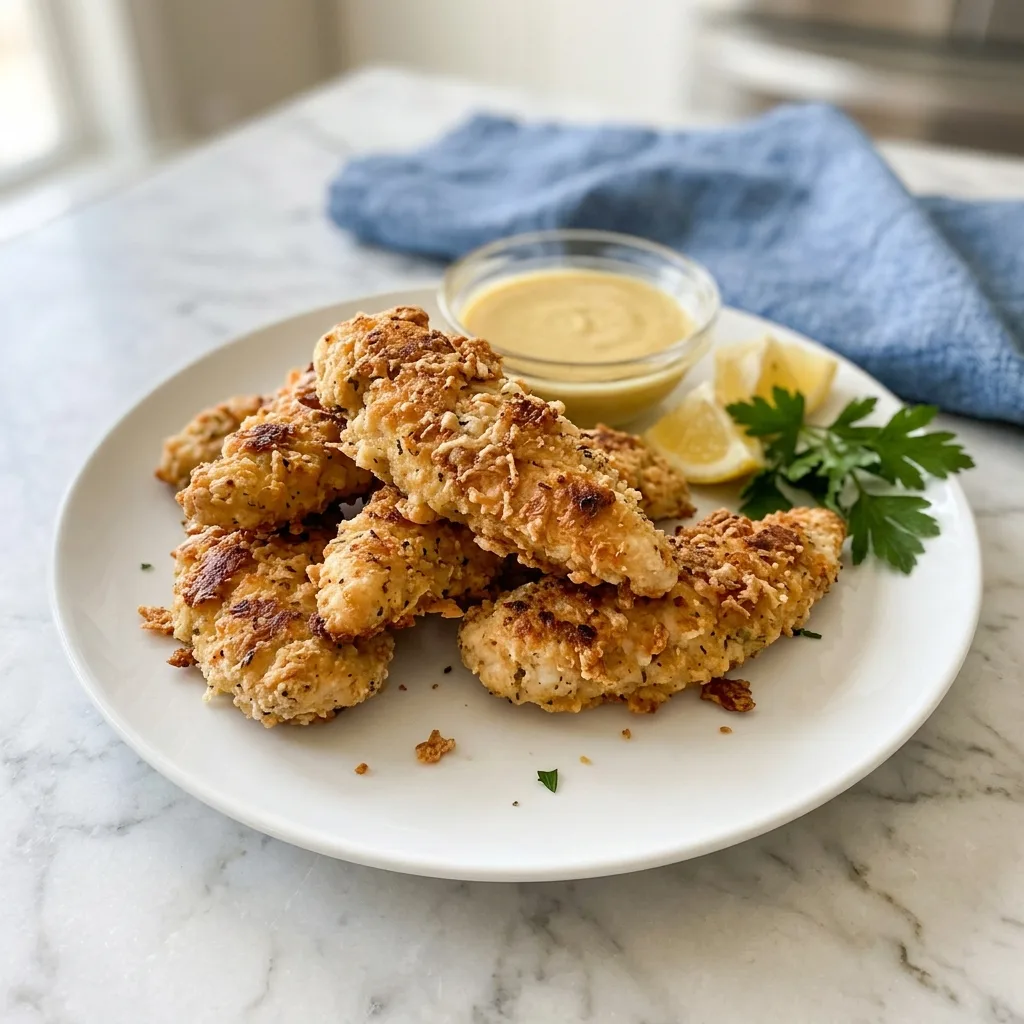
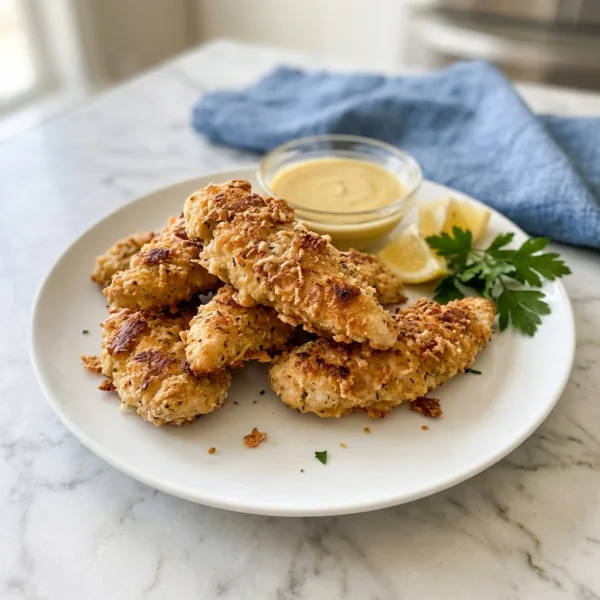
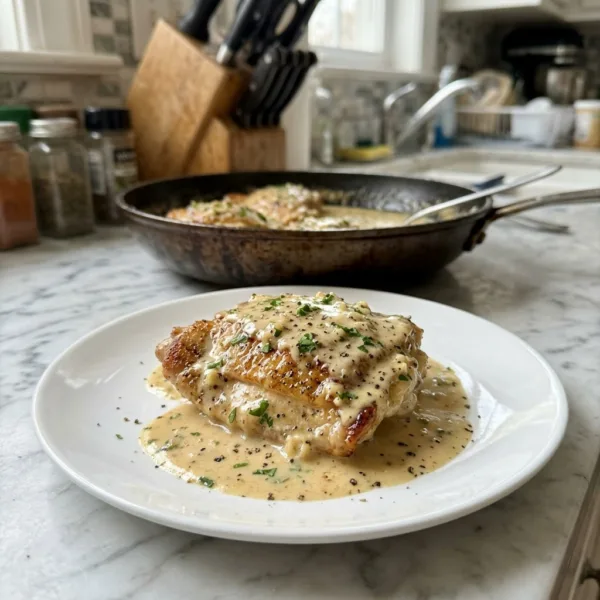
Juicy chicken tenders in a crunchy parmesan panko crust, baked until golden and served with a quick honey mustard dip.
Prep15 min
Cook20 min
Total35 min
Serves4
LevelEasy
What makes it special
Chicken tenderloins
Parmesan
Panko
Parsley
Golden, crunchy and juicy inside, these crispy baked parmesan chicken tenders deliver everything you love about fried chicken fingers without a drop of frying oil. The coating is a mix of panko breadcrumbs and grated parmesan, seasoned with garlic powder and paprika, and the secret to the crunch is simple: the tenders bake on a wire rack, so hot air circulates all the way around. Serve them with a quick honey mustard dip, and you have a dinner that kids and adults will both ask for again.
The whole recipe takes about thirty five minutes from start to finish, and it uses ingredients you probably already have. Most of the time is hands off while the oven does the work. If you have ever baked chicken tenders and ended up with soggy bottoms or pale coating, this method solves both problems. Here is everything you need to make them perfectly crisp every time.
Why you will love these baked parmesan chicken tenders
There are plenty of chicken tender recipes out there, and here is why this one stands out:
They are truly crispy. Panko and parmesan make a crunchy, savory crust, and the wire rack keeps the bottoms from steaming.
They are baked, not fried. You use only a light spray of oil, so there is no splatter, no deep pot of hot oil and much easier cleanup.
The chicken stays juicy. The coating seals in moisture, and the quick high heat cooks the tenders before they can dry out.
They are kid approved. The flavor is mild and cheesy, and the shape is perfect for dipping.
They come together fast. Fifteen minutes of prep and twenty minutes of baking is all it takes.
They are great for meal prep and parties. The recipe doubles easily, and the tenders reheat well in the oven or air fryer.
What makes baked chicken tenders crispy?
Crispy baked chicken is a matter of technique. Baked coatings often turn out soft for three reasons: moisture is trapped under the chicken, the breading is not dry enough, or the oven is not hot enough. This recipe addresses all three.
First, the wire rack. Placing the tenders on a rack set over a baking sheet lets hot air flow underneath, so the bottom crisps as well as the top. Without a rack, the underside sits in its own steam and softens.
Second, panko. These Japanese style breadcrumbs are larger, lighter and flakier than standard breadcrumbs, and they stay crunchy when baked. Mixing in grated parmesan adds flavor and helps the crust brown.
Third, high heat and oil. A 425 F oven browns the crust quickly, and a generous spray of oil on the tops mimics the fat that would be used in frying. Without it, the panko can look dry and pale.
Ingredients you will need
This recipe has two parts, the chicken and the dip. Here is what you need and why.
The chicken
One and a half pounds of chicken tenderloins is the ideal cut. Tenderloins are the thin, naturally tender strips that run along the breast, and they cook evenly and quickly. If you only have chicken breasts, slice them into strips about three quarters of an inch thick.
The breading station
Half a cup of all purpose flour is the first coating, which helps the egg stick. Two large beaten eggs act as the glue. The final coating is one cup of panko breadcrumbs mixed with half a cup of grated parmesan, a teaspoon each of garlic powder and paprika, three quarters of a teaspoon of salt and a quarter teaspoon of black pepper. Use finely grated parmesan, the kind you grate yourself or buy in a canister, since coarse shreds do not stick as well.
The oil
Olive oil spray or two tablespoons of olive oil brushed over the tops helps the crust brown and crisp. An aerosol or pump spray gives the most even coverage.
The honey mustard dip
A quarter cup of mayonnaise, two tablespoons of dijon mustard, a tablespoon of honey, a teaspoon of lemon juice and a pinch of salt make a creamy, sweet and tangy dip in less than two minutes. It is a classic pairing for crispy chicken.
How to make crispy baked parmesan chicken tenders
The full recipe card is below. Here is the process in detail, with the reasoning behind each step.
Heat the oven and prepare the rack
Heat the oven to 425 F (220 C). Set a wire cooling rack inside a rimmed baking sheet and spray the rack with oil so the coating does not stick to it. If you do not have a rack, a parchment lined sheet pan will still work, though you will need to flip the tenders and they will be a little less crisp on the bottom.
Set up the three bowls
Line up three shallow bowls or plates. Put the flour in the first. Put the beaten eggs in the second. In the third, mix the panko with the parmesan, garlic powder, paprika, salt and pepper. Working in an assembly line keeps the process neat and quick.
Coat the chicken
Pat the tenders dry with paper towels. Dry chicken holds the coating better. Dip each tender into the flour and shake off the excess, then dip it in the egg and let the extra drip off, then press it firmly into the panko mixture, turning to coat all sides. Pressing is important, because it makes the crumbs stick. Use one hand for the dry coatings and the other for the egg to avoid clumpy fingers.
Arrange on the rack
Place the coated tenders on the rack with a little space between each one so air can circulate. Spray the tops generously with oil until the panko looks lightly saturated and no dry spots remain.
Bake
Bake for eighteen to twenty minutes, flipping once halfway through, until the coating is deep golden brown and the chicken reaches 165 F (74 C) on an instant read thermometer. If you want a little extra color, switch to the broiler for the final minute, watching closely.
Make the dip and serve
While the chicken bakes, stir the mayonnaise, dijon, honey, lemon juice and salt together until smooth. Serve the tenders hot with the dip and a sprinkle of chopped parsley.
Tips for the crispiest tenders
Use the wire rack. It is the single biggest factor in crispy bottoms.
Press the panko on firmly. A firm press helps the crumbs adhere, so they do not fall off in the oven.
Do not skip the oil spray. Panko needs a little fat to brown. Coat the tops generously.
Do not crowd the pan. Overcrowding traps steam. If your pan is small, use two sheets.
Pat the chicken dry first. Moisture on the surface makes the flour layer gummy.
Preheat the oven fully. Placing the tenders in a cool oven leads to a slower, softer crust.
Use a thermometer. Pulling the tenders at 165 F ensures they are safe and juicy rather than overcooked.
Common mistakes to avoid
Most disappointing baked tenders can be traced to one of a few common slip ups.
The first is skipping the rack and baking on a flat sheet. The tenders cook in their own moisture, and the bottom crust goes soft. If you do not have a rack, flip the tenders at the halfway point and expect a slightly lighter crunch.
The second is a loose coating. If the crumbs fall off, the chicken was probably too wet or the panko was not pressed firmly. Pat the chicken dry and use a firm press at the last stage.
The third is overbaking. Tenders are thin and cook quickly. Once the coating is golden and the internal temperature reaches 165 F, take them out. Another five minutes can mean dry chicken.
The fourth is a mild oven. If your oven runs cool, the coating will take longer to brown and the chicken will dry before the crust gets crisp. An inexpensive oven thermometer can confirm that your oven is truly at 425 F.
Variations and substitutions
These tenders are a flexible base for all kinds of flavors.
Use chicken breasts. Slice them into strips about three quarters of an inch thick so they cook in the same time.
Make them in the air fryer. Cook at 400 F (200 C) for ten to twelve minutes, flipping once, in batches so the basket is not crowded.
Add some heat. Stir a half teaspoon of cayenne or a teaspoon of chili powder into the panko mixture for a spicy kick.
Go Italian. Add a teaspoon of dried Italian seasoning to the crumbs and serve with warm marinara for dipping.
Make them gluten free. Use gluten free panko and a one to one gluten free flour.
Try other dips. Ranch, barbecue sauce, buffalo sauce, ketchup or a garlic aioli are all good choices.
Use nuts for extra crunch. Replace a quarter cup of the panko with finely chopped almonds or crushed cornflakes.
What to serve with chicken tenders
Crispy tenders are easy to turn into a complete dinner. Serve them with oven roasted potato wedges or sweet potato fries, a creamy coleslaw, or a crisp green salad. Steamed or roasted vegetables like broccoli, green beans or carrots balance the plate. For a more indulgent meal, pair them with macaroni and cheese or mashed potatoes.
The tenders are also wonderful chopped over a big salad, tucked into a wrap with lettuce and ranch, or stacked in a sandwich with pickles and a drizzle of honey mustard. For game day or a party, serve them on a platter with several dipping sauces and let everyone choose their favorite.
Make ahead, storage and reheating
You can bread the tenders up to four hours ahead and keep them on the rack in the fridge, uncovered, until ready to bake. This actually helps the coating set. Spray with oil just before they go into the oven.
Refrigerating: Store leftover baked tenders in an airtight container for up to four days.
Freezing: Freeze the baked tenders in a single layer on a tray until solid, then move them to a freezer bag for up to three months. Reheat from frozen at 400 F for about twelve minutes. You can also freeze the unbaked, breaded tenders and bake them directly from the freezer with a few extra minutes of baking time.
Reheating: Use a hot oven or an air fryer rather than the microwave. A microwave softens the crust and makes the tenders rubbery. Five to eight minutes at 400 F brings the crunch back.
Why this method works so well
It helps to understand what is happening in the oven, because it makes you a better cook for all kinds of baked and breaded foods. When the chicken heats, moisture rises from the meat toward the surface. In a fryer, that moisture bubbles away in hot oil. In an oven, it has to escape into the air. A rack gives it a path out on every side. At the same time, the panko dries and toasts, the parmesan melts and browns, and the oil spray helps the crumbs turn golden. The result is a crust with the crackle of fried chicken and a fraction of the mess.
A note on chicken safety
Chicken is safe when its thickest part reaches 165 F (74 C). An instant read thermometer is the most reliable way to check, and it prevents both undercooking and overcooking. Wash your hands and any surfaces after handling raw chicken, and use one hand for wet ingredients and the other for dry coatings to keep your breading station tidy and clean.
Making them for a crowd
This recipe doubles and triples easily. Use two baking sheets with racks and rotate them between the upper and lower oven shelves halfway through. For a party, keep finished tenders warm in a 200 F oven on a rack while you finish the batches, so they stay crisp without drying out. Offer a few different dips and a simple side so guests can help themselves.
Frequently asked questions
Can I use chicken breasts?
Yes. Slice them into strips about three quarters of an inch thick so they cook evenly in the same time.
Can I make them in the air fryer?
Yes. Cook at 400 F (200 C) for ten to twelve minutes, flipping once, in batches so the basket is not crowded.
How do I keep them crispy?
Bake on a wire rack and serve right away. To reheat, use a hot oven or air fryer instead of the microwave.
Can I freeze them?
Yes. Freeze the baked tenders on a tray, then store in a bag up to three months and reheat from frozen at 400 F for twelve minutes.
Why is my coating falling off?
The chicken may have been too wet, or the crumbs were not pressed on firmly. Pat the chicken dry and press the panko firmly onto each side.
Can I use regular breadcrumbs instead of panko?
You can, but the crust will be denser and less crunchy. Panko gives the lightest, crispiest result.
Do I need to flip the tenders?
On a wire rack, flipping is optional but helps even browning. On a flat sheet, flipping is important.
Can I skip the flour and egg?
The flour and egg act as a glue for the panko. Without them, the coating will not stay on. A thin coat of mayonnaise or mustard can substitute for the egg.
What internal temperature should the chicken reach?
165 F (74 C) in the thickest part of the tender.
Can I make the dip ahead?
Yes. The honey mustard dip keeps in the fridge for up to five days, and the flavor improves after a few hours.
Choosing the best chicken for tenders
Look for chicken tenderloins that are pale pink, plump and free of excess liquid in the package. If they come with a white tendon running through the center, you can pull it out by gripping the tendon with a paper towel and sliding a knife along it. This small step makes the tenders more tender to bite. If your tenders vary widely in size, trim the thicker ones or slice them lengthwise so everything finishes baking at the same time. Fresh chicken gives the best texture, but thawed frozen tenderloins work well too, as long as you pat them very dry before breading.
Serving ideas for kids and parties
For a kid friendly dinner, cut the tenders into bite size nuggets and bake them for about twelve to fourteen minutes. Serve them in a paper lined basket with small cups of dip. For a party, arrange the tenders on a board with carrot sticks, celery, pickles and three or four sauces, such as honey mustard, ranch and barbecue. Because the tenders hold their crunch on a rack, they stay appealing at the table longer than most baked chicken, which makes them a dependable choice for a casual gathering or a lunchbox treat the next day.
Final thoughts
These crispy baked parmesan chicken tenders prove that you can have crunchy, golden, crowd pleasing chicken with a fraction of the work. A wire rack, a coating of panko and parmesan and a hot oven are the whole secret. Make a double batch, because they disappear quickly, and keep the honey mustard dip on hand for dunking. They are the kind of recipe that works for a Tuesday dinner, a birthday party and a lunchbox treat alike.
If you try this recipe, leave a rating and a comment below and tell me which dip you chose. I would love to hear how your tenders turned out.
Crispy baked parmesan chicken tenders with a golden panko crust and an easy honey mustard dip. Serves 4 in 35 minutes with no frying.
Chicken Easy American
Prep
15 min
Cook
20 min
Total
35 min
Servings
4
Ingredients 15 items
Tap to check off as you go
For the chicken
For the honey mustard dip
Instructions 7 steps
1
Heat the oven
Heat the oven to 425 F (220 C) and set a wire rack over a baking sheet. Spray the rack with oil.
2
Set up three bowls
Put the flour in one shallow bowl, the beaten eggs in a second and the panko mixed with the parmesan, garlic powder, paprika, salt and pepper in a third.
3
Coat the chicken
Pat the tenders dry, dip each in the flour, then the egg, then press firmly into the panko mixture.
4
Arrange
Place the tenders on the rack with space between them and spray the tops generously with oil.
5
Bake
Bake for 18 to 20 minutes, flipping once halfway, until deep golden and the chicken reaches 165 F (74 C).
6
Make the dip
Stir the mayonnaise, dijon, honey, lemon juice and salt together until smooth.
7
Serve
Serve the tenders hot with the dip and a sprinkle of parsley.
Nutrition per serving
Calories
420
Protein
42g
Carbs
24g
Fat
17g
Sugar
3g
Fiber
1g
Sodium
760mg
Questions, answered
Can I use chicken breasts?
Yes. Slice them into strips about 3/4 inch thick so they cook evenly in the same time.
Can I make them in the air fryer?
Yes. Cook at 400 F (200 C) for 10 to 12 minutes, flipping once, in batches so the basket is not crowded.
How do I keep them crispy?
Bake on a wire rack and serve right away. To reheat, use a hot oven or air fryer instead of the microwave.
Can I freeze them?
Yes. Freeze the baked tenders on a tray, then store in a bag up to 3 months and reheat from frozen at 400 F for 12 minutes.
Recipe by
Denise
Home cook, baker and serial recipe tweaker. I share the dishes my family asks for most, written step by step so they turn out right in your kitchen too.