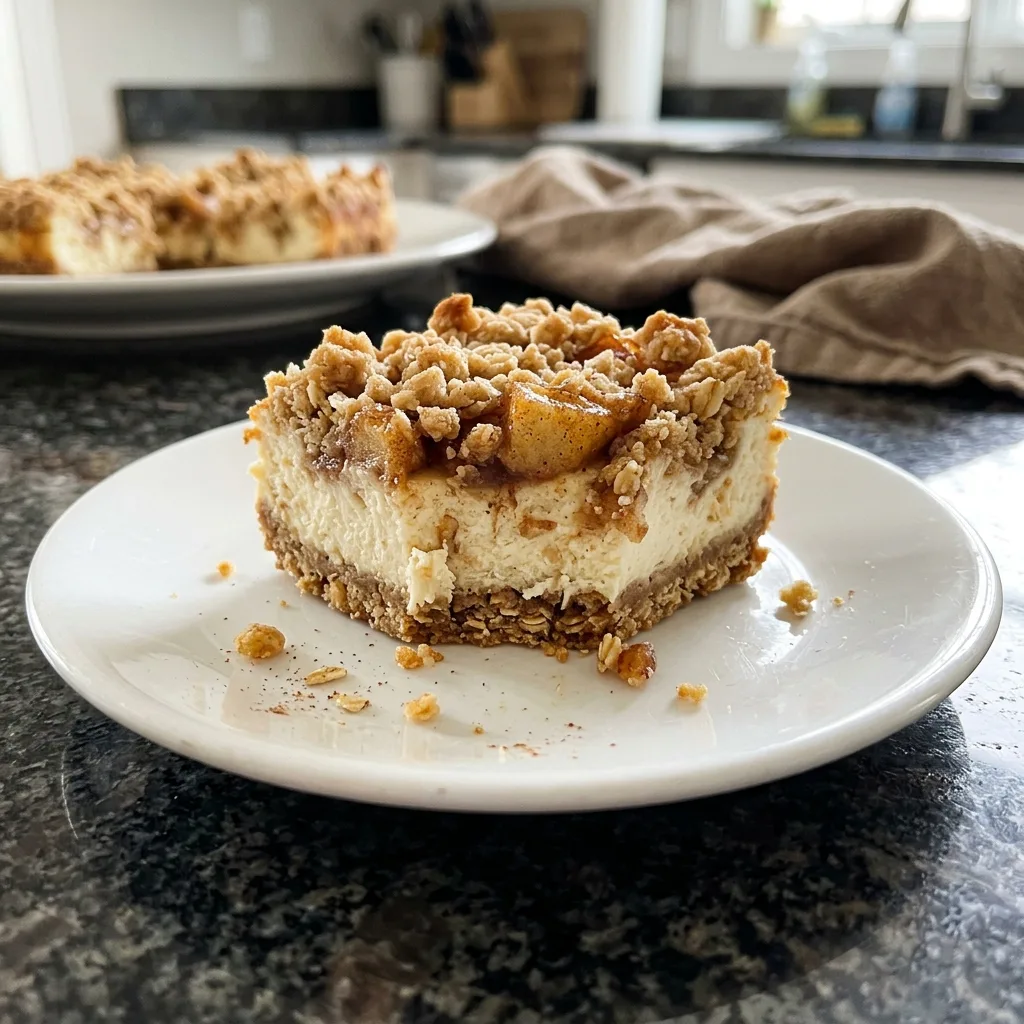
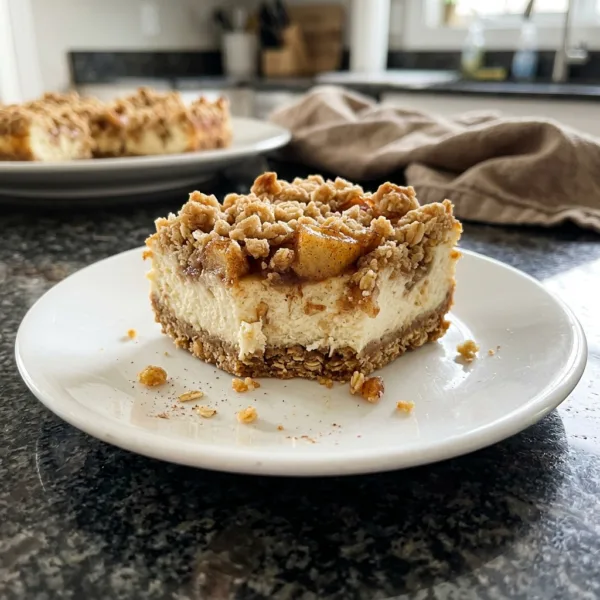
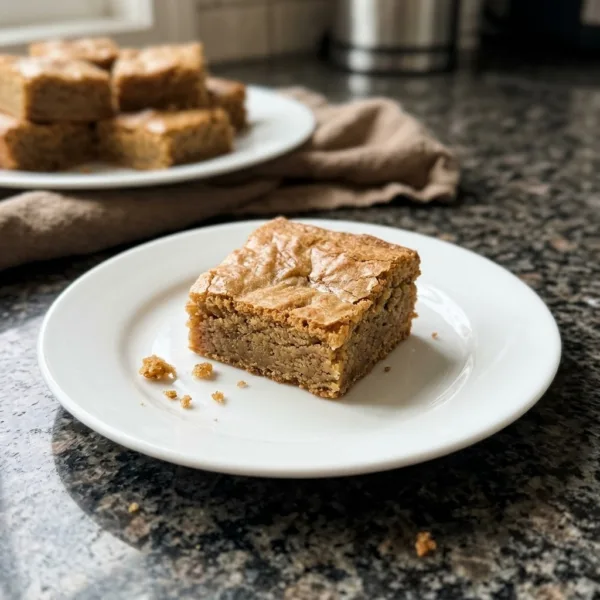
Creamy cheesecake, cinnamon apples and a golden oat crumble on a buttery crust, all in one easy 9 by 13 pan.
Prep25 min
Cook50 min
Total5 hr 15 min
Serves16
LevelEasy
What makes it special
Apples
Cream cheese
Butter
Cinnamon
If you love apple pie, apple crisp and a thick slice of classic cheesecake, these apple crumble cheesecake bars bring all three together in one pan. You get a buttery oat crust, a smooth and creamy cheesecake layer, a spoonful of cinnamon spiced apples in every bite and a golden crumble on top that stays crisp even after a night in the fridge. They look impressive, they feed a crowd and they are far easier to make than a full cheesecake, because there is no water bath, no springform pan and no worry about cracks.
This is the kind of dessert that disappears first at a potluck, a school bake sale or a family dinner. The bars slice cleanly into neat squares, they travel well and they taste even better the next day, once the layers have set and the flavors have had time to settle. If you have a mixing bowl, a 9 by 13 inch pan and about 25 minutes of hands on time, you can make a pan of bakery style bars at home.
Why you will love these apple crumble cheesecake bars
There are plenty of reasons this recipe has become a fall favorite in our kitchen, and these are the ones people mention most often:
Three desserts in one. You get the creamy tang of cheesecake, the soft cinnamon apples of a pie and the crunchy oat topping of an apple crisp, all in a single bite.
One crumble does double duty. The same buttery oat mixture makes both the crust and the topping, so you mix it once, press part of it into the pan and sprinkle the rest on top. That means fewer bowls and less cleanup.
No water bath and no cracks. Bar style cheesecake bakes in a regular metal or glass pan at a moderate temperature, and the apple and crumble layers cover the surface, so a small crack never shows.
Easy to slice and serve. After chilling, the bars cut into tidy squares that you can lift out with a thin spatula and carry anywhere without a fork or a plate.
Make ahead friendly. The bars need several hours in the fridge anyway, so you can bake them the day before and simply cut and serve when guests arrive.
Made with everyday ingredients. Cream cheese, apples, oats, flour, butter and a few pantry staples are all you need. There are no specialty items to hunt down.
What are apple crumble cheesecake bars?
Apple crumble cheesecake bars are a layered baked dessert. The base is a press in crust made from oats, flour, brown sugar and melted butter. On top of the crust goes a simple cream cheese filling that is mixed until smooth and lightly sweetened with vanilla. A layer of diced apples, cooked briefly with cinnamon and brown sugar, goes over the cheesecake, and the rest of the crumble is scattered over the apples before everything bakes together until golden.
The result sits somewhere between a cheesecake, a dessert bar and an apple crisp. The filling is creamy and slightly tangy, the apples are tender and warmly spiced and the topping has a satisfying crunch. Because the bars are baked in a sheet pan, they are much more forgiving than a traditional cheesecake, which makes them a great choice for beginner bakers and busy hosts.
Ingredient notes and smart substitutions
This recipe uses simple ingredients, but a few small choices make a big difference in the final texture and flavor. Here is what to know about each layer.
Apples
Choose firm apples that hold their shape when baked. Granny Smith apples are a classic choice because their tartness balances the sweet cheesecake and the sugary crumble. Honeycrisp, Braeburn, Jonagold and Pink Lady all work well too. A mix of one tart and one sweet variety gives the most interesting flavor. Avoid very soft apples such as Red Delicious or McIntosh, which turn mushy and release too much liquid. Dice the apples small, about a quarter of an inch, so they cook through in the short time they spend in the oven and so every bar has a good spread of fruit.
Cream cheese
Use full fat block cream cheese, not the spreadable kind sold in tubs. Block cream cheese has less water and sets into a firm, sliceable filling. Let it sit on the counter for at least an hour so it is truly soft. Cold cream cheese leaves tiny lumps that never beat out, and no amount of mixing will fix that later. Reduced fat cream cheese can work in a pinch, but the filling will be a little softer and less rich.
Oats
Old fashioned rolled oats give the crust and topping the best chew and crunch. Quick oats also work and produce a slightly finer, more tender crumble. Avoid steel cut oats, which stay hard and gritty. If you need the bars to be gluten free, use certified gluten free oats and swap the flour as described in the FAQ below.
Butter
Unsalted butter lets you control the salt level. The butter is melted for this recipe, which makes the crumble easy to mix and press. If you only have salted butter, simply reduce the added salt in the crumble by half. Make sure the melted butter has cooled for a minute or two before you stir it in so it does not scramble anything or turn the oats gummy.
Brown sugar
Brown sugar gives both the crumble and the apples a caramel note that white sugar cannot match. Light brown sugar is the standard, though dark brown sugar adds a deeper molasses flavor if you like that. Pack it into the measuring cup so you get the right amount.
Cinnamon
Cinnamon is the main spice here and it appears in both the crumble and the apples. A pinch of nutmeg or a little apple pie spice is a lovely addition if you want a more layered, bakery style flavor. Fresh ground cinnamon tastes brighter, so if your jar has been in the cupboard for years, it is worth replacing.
Egg and sour cream
One egg helps the cheesecake layer set into a creamy, sliceable texture. A spoonful of sour cream adds a gentle tang and keeps the filling soft instead of dense. Greek yogurt can stand in for the sour cream with nearly identical results. Bring both to room temperature along with the cream cheese so the batter mixes smoothly.
Lemon juice and cornstarch
A little lemon juice keeps the apples bright and lifts the flavor, and a tablespoon of cornstarch thickens the juices so the apple layer stays jammy instead of watery. Do not skip the cornstarch, because it protects the cheesecake layer from becoming soggy.
Equipment you will need
You do not need anything fancy to make these bars. A 9 by 13 inch baking pan, either metal or glass, is the main requirement. Line it with parchment paper so the bars lift out in one piece, leaving a little overhang on the two long sides to use as handles. You will also need a large mixing bowl for the crumble, a second bowl or a stand mixer for the cream cheese filling, a skillet or saucepan for the apples, a spatula and a sharp knife for slicing. A hand mixer makes the filling very smooth, but a whisk and a little patience work fine as long as the cream cheese is soft.
How to make apple crumble cheesecake bars, step by step
The process has four short stages: make the crumble, cook the apples, mix the cheesecake and assemble. Everything comes together quickly, and while the crust bakes you can prepare the rest.
Step 1: Prepare the pan and make the crumble
Heat the oven to 350 degrees Fahrenheit (175 degrees Celsius). Line a 9 by 13 inch pan with parchment paper. In a large bowl, stir together the flour, oats, brown sugar, cinnamon and salt. Pour in the melted butter and mix with a fork until the mixture looks like damp, clumpy sand. Set aside about one cup of the crumble for the topping, then press the remaining mixture firmly and evenly into the bottom of the pan. Use the bottom of a measuring cup to pack it down so the crust holds together when you slice the bars.
Step 2: Pre bake the crust
Bake the crust for 12 minutes, until it looks set and is just starting to turn light golden around the edges. This short pre bake keeps the crust from turning soggy under the cheesecake layer. While it bakes, move on to the apples and the filling.
Step 3: Cook the apples
Melt the butter in a skillet over medium heat. Add the diced apples, brown sugar and cinnamon and cook for 4 to 5 minutes, stirring often, until the apples soften slightly and the sugar turns into a glossy syrup. Stir in the lemon juice and the cornstarch and cook for one more minute until the juices thicken. Remove from the heat and let the apples cool while you mix the filling. Warm apples are fine, but they should not be piping hot when they go on the cheesecake.
Step 4: Mix the cheesecake filling
In a bowl, beat the softened cream cheese and the sugar on medium speed for about two minutes until completely smooth and creamy. Scrape down the bowl, then add the egg, sour cream, vanilla and flour. Mix on low speed just until combined. Do not overbeat the filling once the egg is in, because too much air can cause puffing and cracking as it bakes and then sinks as it cools.
Step 5: Assemble the bars
Pour the cheesecake filling over the warm pre baked crust and spread it into an even layer, all the way to the edges. Spoon the cooked apples evenly over the cheesecake, then sprinkle the reserved crumble over the top, breaking it into small and medium clumps so you get a nice mix of textures.
Step 6: Bake, cool and chill
Bake for 30 to 35 minutes, until the edges are set, the center barely jiggles when you nudge the pan and the crumble is golden brown. Let the pan cool on a wire rack for about one hour at room temperature, then refrigerate for at least 3 to 4 hours, or overnight, before slicing. Chilling is what turns the filling from soft to sliceable, so be patient. Lift the bars out using the parchment handles, set them on a cutting board and cut into 16 squares with a sharp knife, wiping the blade clean between cuts.
Timing guide
Plan on about 25 minutes of active work and roughly 50 minutes in the oven, including the pre bake. The cooling and chilling time is the longest part, at around four to five hours in total, so it is easiest to make these in the morning for an evening gathering or the night before for the next day. Here is a simple schedule you can follow: crust and apples in the first 20 minutes, filling and assembly in the next 10, then 30 to 35 minutes of baking, one hour of cooling and at least three hours in the refrigerator.
How to fix common problems
Even simple recipes can run into a hiccup now and then. These quick fixes will save your pan of bars:
The filling is lumpy. The cream cheese was too cold. Next time let it soften for a full hour, and beat it with the sugar alone before adding anything else.
The crust is crumbly when cutting. The base was not pressed firmly enough or the bars were cut before they were fully chilled. Press the crust hard with a flat measuring cup and cut only when the bars are cold.
The center is still very wobbly. Give the pan five more minutes in the oven. The center should have a slight jiggle, but it should not ripple like liquid. It will keep firming up as it cools.
The apples are watery. The apples were too soft or the cornstarch was skipped. Cook the apples until the syrup thickens and use firm baking apples.
The top is browning too fast. Tent the pan loosely with foil for the last ten minutes of baking and check that your oven runs at the right temperature.
The cheesecake has a crack. A small crack is normal and the apple and crumble layers hide it completely. This is one of the best reasons to make bars instead of a whole cheesecake.
Tips for the best apple crumble cheesecake bars
Bring the cream cheese, egg and sour cream to room temperature before you start for the smoothest filling.
Line the pan with parchment, leaving an overhang, so you can lift the whole slab out for clean cuts.
Pack the crust down firmly with the flat bottom of a measuring cup or a glass.
Dice the apples small and even so they cook quickly and distribute well.
Cool the apples for a few minutes before spooning them over the filling so the cheesecake layer does not start melting.
Press a few larger clumps of crumble together with your fingers before sprinkling for a bakery style topping.
Chill the bars fully. This is the single most important step for neat squares.
Wipe your knife clean between slices, and for the sharpest edges, warm the blade under hot water and dry it before each cut.
Variations to try
Once you have made the classic version, these easy twists keep the recipe fresh all season long:
Salted caramel apple. Drizzle a few tablespoons of caramel sauce over the apples before adding the crumble, then add another drizzle and a pinch of flaky salt after baking.
Pecan or walnut crumble. Fold half a cup of chopped nuts into the crumble topping for extra crunch and a toasty flavor.
Pear and ginger. Swap the apples for diced ripe but firm pears and add a half teaspoon of ground ginger to the crumble.
Maple cinnamon. Replace some of the brown sugar in the apples with maple syrup and add a small pinch of nutmeg.
Mini bars. Bake the same mixture in a muffin tin lined with paper liners for 20 to 22 minutes to make individual cheesecake cups.
Gluten free. Use a one to one gluten free baking flour and certified gluten free oats.
Cranberry apple. Add a handful of fresh or frozen cranberries to the apples for a tart holiday twist.
What to serve with apple crumble cheesecake bars
These bars are rich enough to stand alone, but a few simple extras make them feel like a special occasion. A small scoop of vanilla ice cream melting beside a warm square is classic. A dollop of whipped cream, a drizzle of caramel sauce or a dusting of cinnamon turns them into a plated dessert. They pair beautifully with hot coffee, chai or a mug of spiced tea, and they are a natural fit for a fall brunch table next to fresh fruit and yogurt. For a holiday dessert spread, cut them into smaller squares and serve alongside cookies and pie.
Storing and freezing leftovers
Store the bars in an airtight container in the refrigerator for up to five days. Because the filling contains cream cheese, they should not sit at room temperature for more than two hours. To freeze, chill the bars completely, cut them into squares and freeze them on a tray until firm. Then transfer the squares to a freezer bag with parchment between the layers. They keep for up to three months. Thaw overnight in the refrigerator and serve cold, or let them sit for about ten minutes at room temperature for the best texture. The crumble is crispest on the first day, but a few minutes in a warm oven or a toaster oven will bring the topping back to life if it softens.
Make ahead and meal prep tips
These bars are ideal for planning ahead. You can bake the whole pan up to two days before you need it and keep it covered in the refrigerator. You can also make the crumble and cook the apples a day early and store them in separate containers, then assemble and bake on the day of your event. If you are bringing them to a party, leave the bars uncut in the pan, chill them, and slice on arrival so the edges stay sharp. For a grab and go treat during the week, wrap individual squares in parchment and keep them in the fridge.
Common mistakes to avoid
Skipping the pre bake. Without it, the crust steams under the filling and turns soft instead of sturdy.
Using tub cream cheese. It has more water and gives a loose, runny filling that never fully sets.
Overmixing the batter. Mixing at high speed after adding the egg whips in air that causes puffing and sinking.
Cutting too soon. Warm bars slump and smear. Wait until they are cold and firm.
Piling on wet apples. Too much liquid makes the cheesecake layer soggy, so cook the apples down until the juices thicken first.
Underbaking or overbaking. Look for set edges and a slight center jiggle. Overbaked cheesecake turns dry and can crack along the edges.
A note on nutrition
These apple crumble cheesecake bars are a true dessert, made with butter, cream cheese and sugar, so they are best enjoyed in a moderate portion. One square, which is one sixteenth of the pan, comes to around 290 calories. If you want a lighter bar, you can use reduced fat cream cheese, trim the sugar in the filling slightly and cut the pan into 20 smaller squares. The oats and the apples add a little fiber, and the whole recipe is made without any artificial ingredients. The nutrition values on the recipe card are estimates and will vary with the exact products you use.
Frequently asked questions
Can I use a smaller pan?
Yes. For a thicker bar, use a 9 by 9 inch pan and halve the recipe, then bake for about the same time, checking for a slight jiggle in the center. A 9 by 13 inch pan gives you thinner, easier to slice bars that feed a crowd.
Do I have to pre bake the crust?
I strongly recommend it. The short bake sets the base so it stays firm and slightly crisp beneath the creamy filling. Skipping it often leads to a soft, damp crust.
Can I use canned apple pie filling?
You can in a hurry. Use about one and a half cups of chopped pie filling and skip the cooking step. The flavor will be sweeter and the apples softer, but the bars still taste good.
Can I make these without eggs?
The egg helps the filling set, so I do not recommend leaving it out. If you must, a small amount of extra cornstarch and a longer chill time can help, though the texture will be a bit softer.
Why did my cheesecake layer crack or puff?
Overmixing after adding the egg or baking at too high a temperature are the usual causes. The apple and crumble layers hide small cracks, so the finished bars still look beautiful.
How do I get clean slices?
Chill the bars until fully cold, lift them out with the parchment, and cut with a long sharp knife. Wipe the blade clean after every cut and dip it in hot water if the filling sticks.
Can I freeze the unbaked bars?
It is best to bake first and freeze the baked bars. Freezing unbaked cheesecake batter can change the texture of the filling once it thaws.
How do I keep the crumble crisp?
Store the bars uncovered in the fridge for the first hour or two, then cover loosely. Reheat a square briefly in a warm oven to bring back the crunch.
What is the best apple for cheesecake bars?
Granny Smith is the top choice for its firm texture and tartness, and a mix with Honeycrisp or Braeburn gives a pleasing balance of sweet and tart.
Can I make a gluten free version?
Yes. Use a one to one gluten free flour blend in the crumble and the filling, and make sure your oats are labeled gluten free.
However you slice them, these apple crumble cheesecake bars are a cozy, crowd pleasing dessert that tastes like fall. Make a pan, chill it, and watch the squares disappear.
Creamy apple crumble cheesecake bars with cinnamon apples and a golden oat crumble. Makes 16 bars with 25 minutes of prep.
Bars Easy American
Prep
25 min
Cook
50 min
Total
5 hr 15 min
Servings
16
Ingredients 18 items
Tap to check off as you go
For the crust and crumble
For the apple layer
For the cheesecake layer
Instructions 7 steps
1
Make the crumble
Heat the oven to 350 F (175 C) and line a 9 by 13 inch pan with parchment. Stir the flour, oats, brown sugar, cinnamon and salt, mix in the melted butter until clumpy, set aside 1 cup for the topping and press the rest firmly into the pan.
2
Pre bake the crust
Bake the crust for 12 minutes until set and lightly golden at the edges.
3
Cook the apples
Melt the butter in a skillet, add the apples, brown sugar and cinnamon and cook 4 to 5 minutes. Stir in the lemon juice and cornstarch and cook 1 minute until thick, then let cool slightly.
4
Mix the cheesecake
Beat the cream cheese and sugar until smooth, then mix in the egg, sour cream, vanilla and flour on low speed just until combined.
5
Assemble
Spread the filling over the warm crust, spoon the apples on top and sprinkle with the reserved crumble.
6
Bake
Bake 30 to 35 minutes until the edges are set, the center barely jiggles and the crumble is golden.
7
Chill and serve
Cool 1 hour, then chill at least 3 to 4 hours. Lift out with the parchment and cut into 16 squares.
Nutrition per serving
Calories
290
Protein
4g
Carbs
36g
Fat
15g
Sugar
22g
Fiber
1g
Sodium
180mg
Questions, answered
Can I use a smaller pan?
Yes. Halve the recipe and bake in a 9 by 9 inch pan for a similar time.
Can I freeze these bars?
Yes. Freeze cut squares up to 3 months and thaw overnight in the fridge.
Which apples work best?
Granny Smith, Honeycrisp or Braeburn hold their shape when baked.
How long do they keep?
Up to 5 days in an airtight container in the refrigerator.
Recipe by
Denise
Home cook, baker and serial recipe tweaker. I share the dishes my family asks for most, written step by step so they turn out right in your kitchen too.