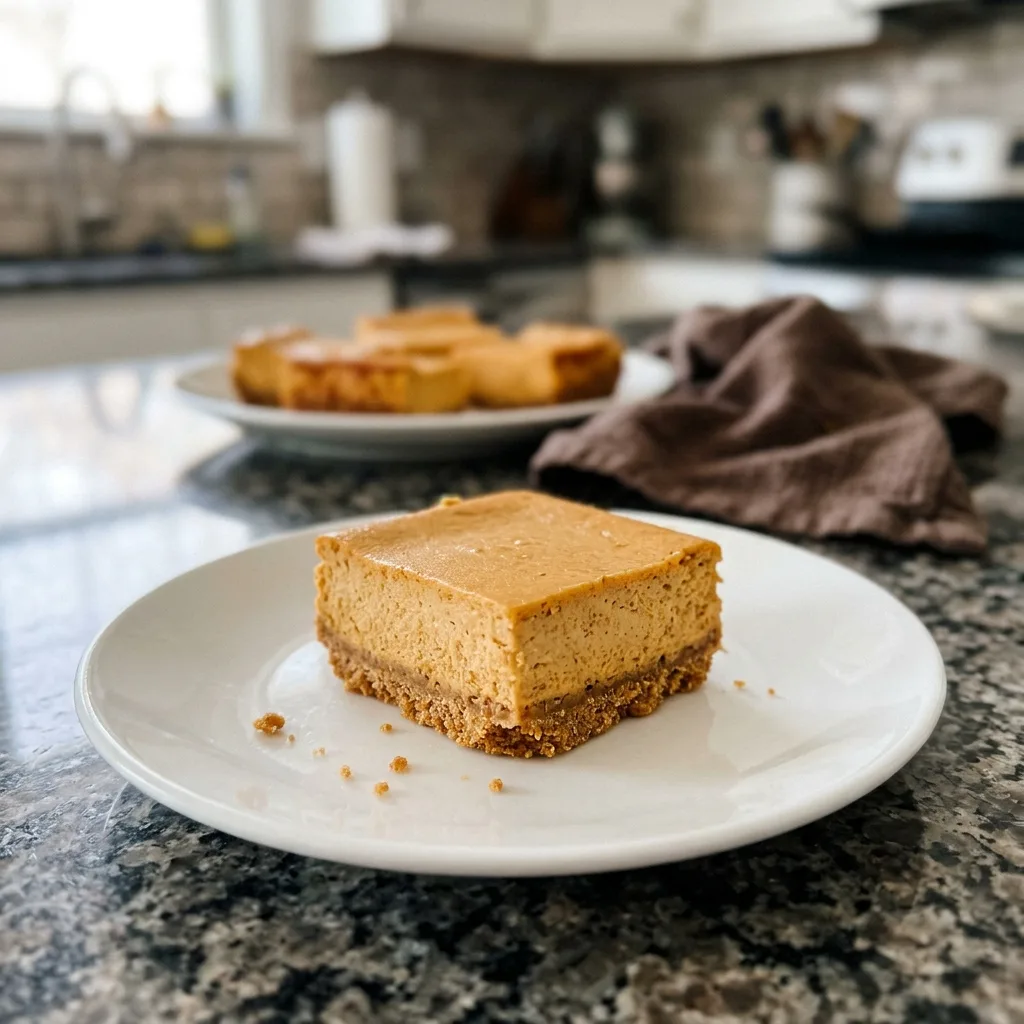
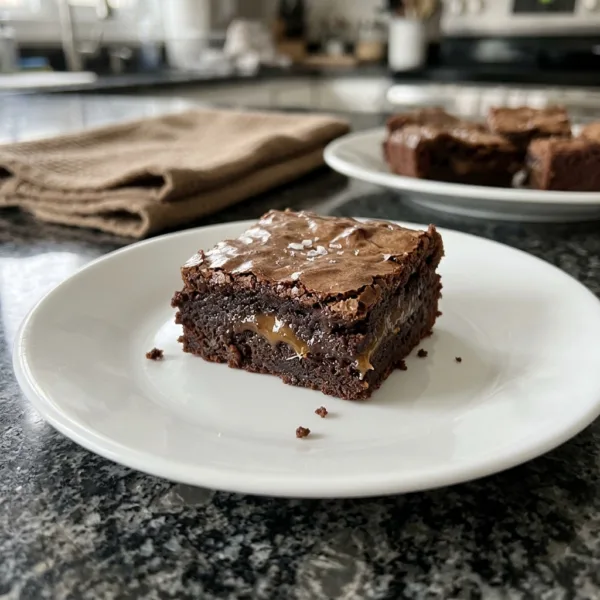
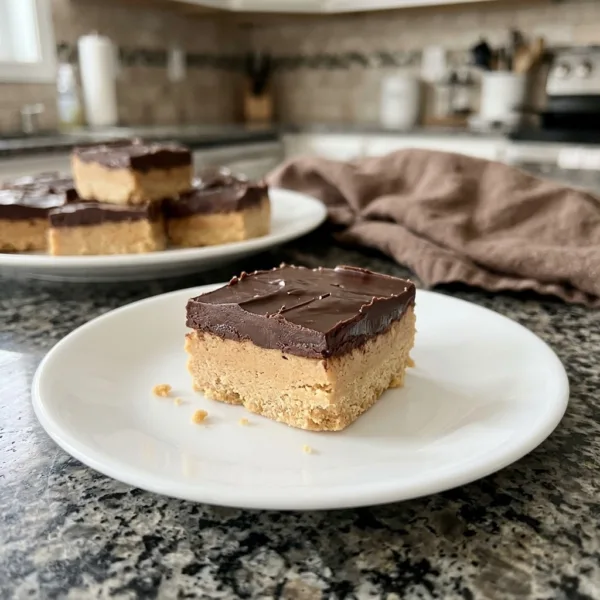
A buttery graham cracker crust holds a thick layer of silky, spiced pumpkin cheesecake, chilled into neat squares that are easy to cut and serve.
Prep20 min
Cook40 min
Total6 hr
Serves16
LevelEasy
What makes it special
Pumpkin puree
Cream cheese
Graham crackers
Warm spices
If you love pumpkin pie and cheesecake equally, these pumpkin cheesecake bars are the dessert you have been waiting for. A buttery graham cracker crust holds a thick layer of silky, spiced pumpkin cheesecake, and the whole pan chills into neat squares that are easy to cut, easy to carry and impossible to stop eating. They taste like autumn, and they look beautiful on any dessert table.
The recipe is much easier than a full cheesecake. There is no springform pan, no water bath and no worry about cracks. You mix the crust, press it into a pan, whisk the filling, bake it, and let the refrigerator do the rest. About twenty minutes of work gives you sixteen generous bars that are perfect for Thanksgiving, potlucks, bake sales or a cozy night at home.
Why you will love these pumpkin cheesecake bars
The best of two desserts. You get the warm spices of pumpkin pie and the creamy tang of cheesecake in every bite.
No special equipment. A regular 9 by 13 inch pan and a whisk or a hand mixer are all you need.
Make ahead friendly. The bars need to chill for several hours, so they are ideal for making the day before a gathering.
Easy to cut and serve. They slice into clean squares, so they are much less fussy than a whole cheesecake.
Great for a crowd. One pan makes sixteen bars, and they travel well in a covered container.
Simple ingredients. Cream cheese, canned pumpkin, eggs, sugar and a few spices are everything you need for the filling.
What are pumpkin cheesecake bars?
Pumpkin cheesecake bars are a baked dessert made with a cookie crumb crust and a creamy filling of cream cheese, pumpkin puree, eggs and warm spices. They are baked in a rectangular pan, chilled until firm and cut into squares. The texture sits between a pumpkin pie and a classic cheesecake: smooth, dense and creamy, with a gentle spice and a clean, slightly tangy finish from the cream cheese.
They are one of the most popular fall desserts, and for good reason. They use pantry staples, they can be made in advance and they please almost everyone at the table, including people who say they do not usually like pumpkin.
Ingredients you will need
Here is what goes into the bars and why each ingredient matters:
Graham cracker crumbs. They make a sweet, buttery crust that supports the creamy filling. You can crush whole crackers or buy crumbs.
Butter. Melted butter holds the crumbs together and gives the crust a rich flavor.
Cream cheese. Use full fat blocks, not the spreadable tub, and make sure it is fully softened so the filling is smooth.
Pumpkin puree. Choose plain pure pumpkin, not pumpkin pie filling, which already contains sugar and spices.
Sugar. Granulated sugar sweetens the filling and keeps the texture silky.
Eggs. They set the filling into a sliceable custard. Use them at room temperature so they blend in smoothly.
Flour. A small spoonful helps the filling hold its shape and reduces the chance of cracks.
Cinnamon, ginger, nutmeg and cloves. The classic pumpkin spices, which give the bars their cozy flavor.
Vanilla extract. It rounds out the spices and the cream cheese.
The secret to a smooth, creamy filling
The most important step for a smooth filling is softening the cream cheese. Leave the blocks on the counter for about an hour, or unwrap them and microwave them for ten to fifteen seconds. Cold cream cheese leaves small lumps that never disappear, no matter how long you mix.
The second secret is to mix gently. Beat the cream cheese and sugar until smooth first, then add the pumpkin, the eggs and the spices on low speed and stop as soon as everything is combined. Too much air makes the filling puff in the oven and then sink and crack as it cools.
How to make pumpkin cheesecake bars, step by step
1. Prepare the pan
Heat the oven to 325 F (165 C). Line a 9 by 13 inch baking pan with parchment paper, leaving an overhang on two sides so you can lift the bars out later.
2. Make the crust
Stir the graham cracker crumbs, sugar and melted butter together until the mixture looks like wet sand. Press it firmly into the bottom of the pan with the bottom of a measuring cup, then bake for 8 minutes until it smells toasty.
3. Beat the cream cheese
In a large bowl, beat the softened cream cheese and sugar until completely smooth and creamy, scraping down the bowl once or twice.
4. Add the pumpkin and the eggs
Mix in the pumpkin puree, the flour, the vanilla and the spices. Add the eggs one at a time on low speed, mixing only until each one disappears.
5. Bake the bars
Pour the filling over the warm crust, smooth the top and bake for 35 to 40 minutes. The edges should be set and the center should still jiggle slightly when you shake the pan gently.
6. Cool and chill
Cool the pan on a rack for one hour, then cover and refrigerate for at least four hours, or overnight. This step is not optional, because the bars firm up as they chill and the flavor deepens.
7. Cut and serve
Lift the bars out with the parchment, set them on a cutting board and cut them into sixteen squares with a sharp knife, wiping the blade clean between cuts. Serve cold with a dollop of whipped cream and a sprinkle of cinnamon.
Tips for the best pumpkin cheesecake bars
Use block cream cheese. It has less water than tub cream cheese and sets into a firm, creamy bar.
Do not overbake. The center should still wobble a little. The bars finish setting in the refrigerator.
Press the crust firmly. A tightly packed crust cuts cleanly and does not crumble when you lift out a bar.
Cool gradually. Leaving the pan on the counter before chilling helps prevent cracks.
Use a hot, clean knife. Dip the knife in hot water and wipe it dry between cuts for smooth edges.
Chill overnight if you can. The texture is firmer and the spices taste deeper the next day.
Do pumpkin cheesecake bars need a water bath?
No. A water bath is used for a tall, round cheesecake to protect it from cracking. Bars are thin enough to bake evenly in a regular pan, and the lower baking temperature and gentle mixing keep the top smooth. That is one of the reasons they are so much easier than a full cheesecake.
Topping ideas
The bars are delicious plain, but a topping makes them feel special for the holidays:
Fresh whipped cream with a dusting of cinnamon
A drizzle of salted caramel sauce
Chopped toasted pecans or candied walnuts
A spoonful of sweetened sour cream spread over the cooled bars
Crushed gingersnap cookies for a spicy crunch
A cream cheese frosting piped in small swirls on each square
Variations to try
Gingersnap crust. Replace the graham crackers with crushed gingersnaps for a spicier base.
Pecan crust. Add half a cup of finely chopped pecans to the crumbs for a nutty crunch.
Chocolate swirl. Drop spoonfuls of melted chocolate on the filling and swirl them with a knife before baking.
Maple pumpkin bars. Replace a quarter cup of the sugar with maple syrup for a deeper flavor.
Mini bars. Cut the pan into thirty six small squares for a party platter.
Streusel top. Sprinkle a simple oat and brown sugar streusel over the filling for a bakery style finish.
Why bars are better than a whole cheesecake for gatherings
A whole cheesecake is beautiful, but it can be fragile, and it takes planning to slice and serve. Bars solve all of those problems. They are cut into even portions before anyone arrives, they hold their shape on a plate and they can be passed around a crowded room without needing a fork and a knife. The pan also travels well, which makes it a very practical dessert for potlucks and holiday visits.
A simple make ahead schedule
Two days before: Bake the bars, cool them and refrigerate them in the pan.
The day before: Lift them out, cut them into squares and store them in a covered container with parchment between layers.
The day of the party: Arrange the bars on a platter and add the whipped cream and the cinnamon just before serving.
How to store pumpkin cheesecake bars
Keep the bars covered in the refrigerator for up to five days. Place parchment between layers so they do not stick, and keep the container tightly closed so the bars do not absorb other flavors. Serve them cold or let them sit at room temperature for ten minutes for a softer bite.
Can you freeze pumpkin cheesecake bars?
Yes. Freeze the cut bars on a tray for one hour until firm, then wrap them individually or place them in a container with parchment between layers. They keep for up to three months. Thaw them overnight in the refrigerator. Add the whipped cream and the toppings after thawing, because those do not freeze well.
Common mistakes to avoid
Using pumpkin pie filling. It is already sweetened and spiced, which will throw off the recipe.
Using cold cream cheese. It leaves lumps in the filling.
Overmixing. Too much air causes puffing and cracking.
Overbaking. A dry, overbaked center loses its silky texture.
Cutting too soon. Warm bars are soft and messy. Chill them completely first.
Skipping the parchment. Without it, the bars are hard to lift out of the pan.
Why pumpkin and cream cheese go so well together
Pumpkin has a mild, earthy sweetness that needs help to shine, and the spices do part of the work. Cream cheese does the rest. Its gentle tang and rich, smooth texture balance the sweetness of the pumpkin and keep each bite from feeling heavy. The graham cracker crust adds a toasty crunch and a touch of honey flavor, and together the three layers taste like something you would find in a bakery.
How to cut perfect squares
Clean slices make the bars look professional. After the bars have chilled for at least four hours, lift the whole slab out of the pan using the parchment overhang and place it on a cutting board. Fill a tall glass with hot water, dip a long, thin knife into it and wipe the blade dry with a towel. Press straight down instead of sawing, then wipe the knife again before the next cut. Cut the slab in half lengthwise, then into four rows and four columns for sixteen squares, or into smaller pieces for a party tray. Trimming the very edge of the slab before you start gives each bar a neat, even side.
The spice blend explained
The warm, cozy flavor of the bars comes from four spices that work together. Cinnamon is the lead note, sweet and woody. Ginger adds a gentle heat that keeps the pumpkin from tasting flat. Nutmeg brings a soft, nutty sweetness, and a small pinch of cloves adds depth without taking over. If you want a shortcut, use one and a half teaspoons of pumpkin pie spice in place of the individual spices. The flavor will be slightly different but just as comforting.
Spices lose their strength over time, so check the date on your jars. Fresh spices make a noticeable difference in a recipe that depends on them for most of its flavor, and a quick sniff will tell you if they are still fragrant.
Serving ideas for the holidays
These bars are easy to dress up for a holiday table. Arrange them on a white platter with a small bowl of whipped cream in the center, or stack them on a cake stand with sprigs of rosemary and a few cinnamon sticks around the base. For a party, pair them with a pot of coffee, hot apple cider or a pitcher of spiced tea. They also work beautifully on a dessert board next to apple slices, pecans and small squares of dark chocolate.
Choosing the right pan
A metal 9 by 13 inch pan is the standard for this recipe, and it gives bars that are about one inch tall with a good balance of crust and filling. A glass dish also works, but glass holds heat longer, so reduce the oven temperature by 25 degrees and check the bars a few minutes early. A dark metal pan bakes a little faster than a light one, so keep an eye on the edges.
If you only have a smaller pan, such as 8 inches square, halve the recipe and bake for about the same time. Taller bars need a few extra minutes, and thinner bars need a few fewer, so always rely on the look of the center rather than the clock. The filling should be set around the edges and just barely wobbly in the middle.
Why room temperature ingredients matter
Cold ingredients do not blend smoothly. Cream cheese that is too cold stays lumpy, and cold eggs can make the batter curdle slightly as they hit the creamy mixture. Take the cream cheese and the eggs out of the refrigerator about an hour before you begin. If you forget, place the eggs in a bowl of warm water for five minutes and soften the cream cheese in short bursts in the microwave. The extra few minutes of planning give you a filling that is silky from the first bite to the last.
Baking for a crowd
Because the bars are cut into small squares, one pan goes a long way. At a potluck, expect each guest to take one or two pieces, so a single 9 by 13 inch pan comfortably serves sixteen to twenty people when other desserts are on the table. For a larger event, bake two pans on the same oven rack level and rotate them halfway through. Carry the bars in the pan with a tight lid or foil, and keep them in a cooler with ice packs if the trip is long, since the creamy filling should stay cold until it is served. Bring a small knife and a spatula so the first guests can cut neat pieces without any trouble.
Pumpkin cheesecake bars FAQ
Can I use fresh pumpkin?
Yes, but make sure it is roasted and pureed until very smooth, and drain it in a sieve for a few minutes so it is not watery. Canned pumpkin is more consistent.
Why did my bars crack?
Cracks usually come from overmixing, overbaking or cooling too fast. Mix gently, take the pan out while the center still jiggles and let it cool on a rack before chilling.
Can I make them without a crust?
You can bake the filling in a lined pan, but it will be much softer and harder to cut. The crust gives the bars their structure.
Can I use light cream cheese?
Full fat cream cheese gives the best flavor and texture. Reduced fat versions can make the bars watery.
How do I get clean slices?
Chill the bars completely, lift them out with the parchment and cut with a sharp knife dipped in hot water and wiped dry between cuts.
Can I double the recipe?
Yes. Use two pans or a large rimmed baking sheet and check the bars a few minutes earlier, because thinner bars bake faster.
These pumpkin cheesecake bars bring together everything people love about fall desserts in one easy pan. Make them a day ahead, keep them chilled and watch them disappear at the first gathering you bring them to.
Creamy pumpkin cheesecake bars with a buttery graham cracker crust and warm fall spices. An easy make ahead dessert that makes 16 squares.
Bars Easy American
Prep
20 min
Cook
40 min
Total
6 hr
Servings
16
Ingredients 15 items
Tap to check off as you go
For the crust
For the filling
To serve
Instructions 7 steps
1
Prepare the pan
Heat the oven to 325 F (165 C) and line a 9 by 13 inch pan with parchment, leaving an overhang.
2
Make the crust
Stir the crumbs, sugar and melted butter until like wet sand, press firmly into the pan and bake 8 minutes.
3
Beat the cream cheese
Beat the softened cream cheese and sugar until completely smooth.
4
Add the pumpkin and spices
Mix in the pumpkin, flour, vanilla and spices, then add the eggs one at a time on low speed, mixing just until combined.
5
Bake
Pour the filling over the warm crust, smooth the top and bake 35 to 40 minutes until the edges are set and the center still jiggles slightly.
6
Cool and chill
Cool on a rack for 1 hour, then cover and refrigerate at least 4 hours or overnight.
7
Cut and serve
Lift out with the parchment and cut into 16 squares with a hot, dry knife. Serve with whipped cream and a dusting of cinnamon.
Nutrition per serving
Calories
260
Protein
4g
Carbs
26g
Fat
16g
Sugar
19g
Fiber
1g
Sodium
190mg
Questions, answered
Can I use pumpkin pie filling?
No. Use plain pure pumpkin puree, because pie filling already has sugar and spices.
Why did my bars crack?
Overmixing, overbaking or cooling too fast. Mix gently and cool before chilling.
Do I need a water bath?
No. Bars bake evenly in a regular pan.
How do I store them?
Keep covered in the refrigerator up to 5 days or freeze up to 3 months.
Recipe by
Denise
Home cook, baker and serial recipe tweaker. I share the dishes my family asks for most, written step by step so they turn out right in your kitchen too.