
Poinsettia Placemat and Napkin Ring Crochet Pattern
Uses sc, dc, increases, decreases and a simple lace border.
About 12 to 16 hours for one placemat and three napkin rings.
Red, green and gold pieces that make a handmade holiday table.
About This Poinsettia Placemat and Napkin Ring Crochet Pattern Pattern
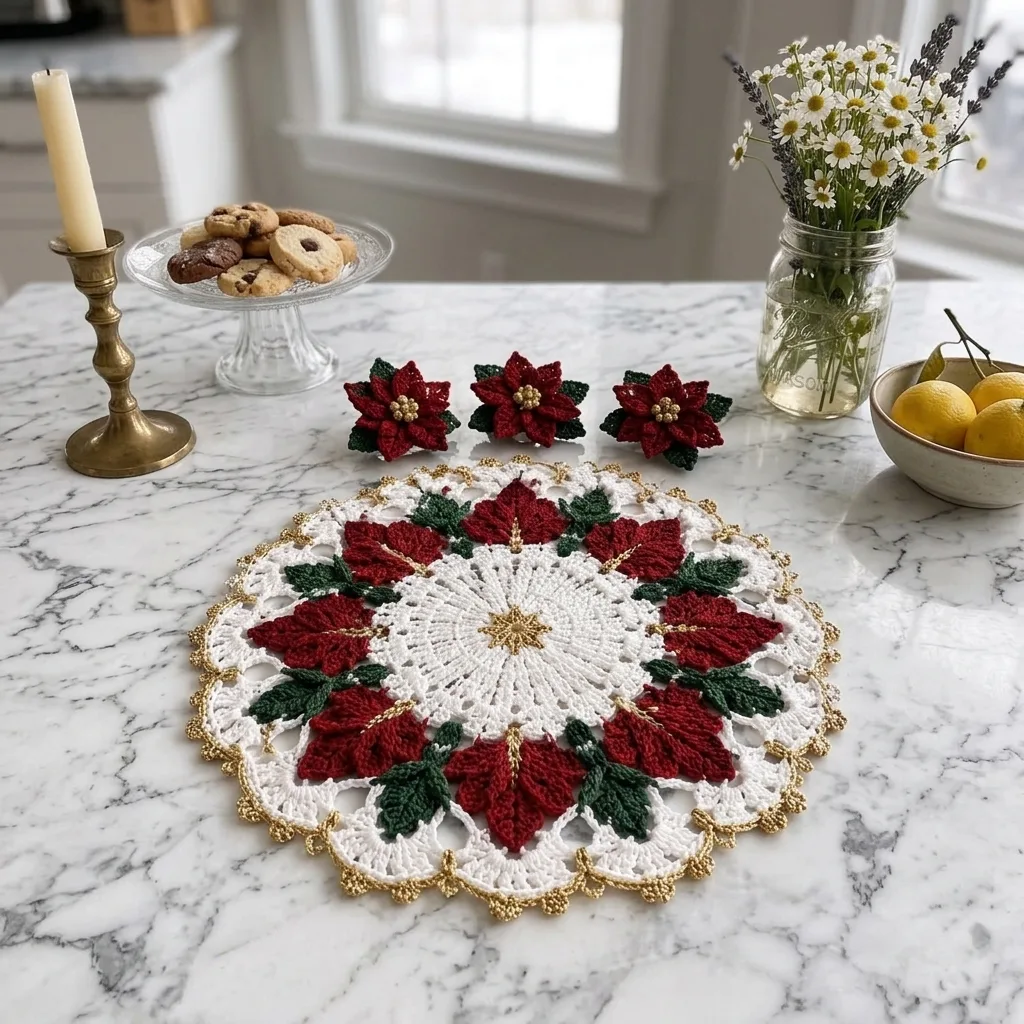
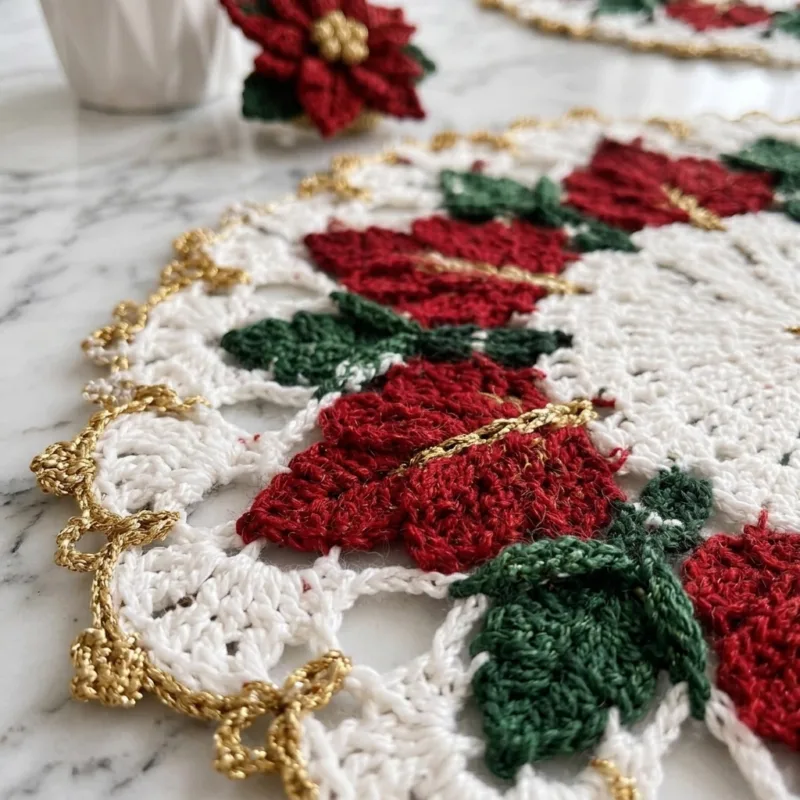
This poinsettia placemat is about 12 inches wide and worked in light cotton yarn. It has a white lace base, a gold star center, six red leaves with gold veins and a gold scalloped edge.
The set also includes three napkin rings, each with a red poinsettia and a cluster of gold beads. You only need single crochet, double crochet, increases and decreases.
Why You'll Love This Poinsettia Placemat and Napkin Ring Crochet Pattern Pattern
I made this set for my own holiday table and I still smile when I see the gold star in the middle. The red leaves and gold veins turn a plain white placemat into something special.
The napkin rings use up leftover red and green, and each one works up in an evening.
Switch Things Up
Try cream leaves with silver veins for a winter white set, or pale pink petals with sage green leaves for a spring table. You can make only the napkin rings in everyday colors and use them all year. Swap the gold beads for small pearls for a softer look.
Materials Needed
— Main Fabric
— Tools Required
The Free Pattern
0% complete
— Placemat Base (white) (Make 1) :
— Placemat Lace Border (white and gold) :
— Gold Center Star (gold) (Make 1) :
— Red Leaf (Make 6) :
— Green Leaf (Make 24, 12 for the placemat and 4 for each napkin ring) :
— Napkin Ring Band (red) (Make 3) :
— Poinsettia Petal (red) (Make 24, 8 for each flower) :
Assembly Instructions
- Pin the placemat flat on a blocking mat, shape the scallops of the border, spritz with water and let it dry completely before you add any pieces.
- Sew the gold star to the center of the placemat with its tail, tacking each point down so it lies flat.
- Space the six red leaves evenly in a ring around the star on Round 6, with the tips pointing outward and the gold veins facing up, and sew them down along both sides.
- Sew the green leaves in 6 pairs between the red leaves, tucking the bases under the red leaves so they look like they grow from behind.
- For each napkin ring, sew 4 red petals together at their bases in a cross, then sew 4 more petals between them to make a full 8 petal poinsettia.
- Sew 4 green leaves behind the flower, then stitch 7 gold beads in a small cluster in the center with the beading needle and thread.
- Sew each finished flower to the middle of a napkin ring band, and weave in all remaining ends.
Common Mistakes & How to Fix Them
Losing the 12 even increase points: place a stitch marker at the start of every repeat so the placemat lies flat and does not ruffle.
Pulling the lace border too tight: keep your ch-4 loops relaxed so the scallops can open up when you block.
Sewing the red leaves unevenly: pin all six first and check the spacing before you sew a single stitch.
Making the napkin ring band too tight: test it around a napkin before you fasten off.

You Might Also Like
Important Notes
Use cotton yarn so the placemat blocks well and holds its shape.
Gauge does not need to be exact, but a firm tension keeps the lace crisp.
Sew the beads on securely, and leave them off if the set is for children.
Hand wash gently in cool water and lay flat to dry.
I hope this set brings a little warmth to your holiday table. Happy hooking!
Crochet Abbreviations
You Ask, We Answer
How big is the finished placemat?
About 12 inches wide. Each napkin ring is about 1.5 inches wide with a flower about 3 inches across.
Can I use a thicker yarn?
Yes. Worsted weight yarn with a 3.5 mm hook gives a larger placemat, so stop after Round 9 to stay near 12 inches.
How do I wash it?
Hand wash gently in cool water, press out the water with a towel and lay it flat to dry.
Success!
Thanks for subscribing — check your inbox for a welcome note.
Abbreviations
- ch — chain
- sl st — slip stitch
- mr — magic ring
- sc — single crochet
- dc — double crochet
- inc — increase (2 stitches in the same stitch)
- sc2tog — single crochet 2 stitches together (decrease)
- sc3tog — single crochet 3 stitches together (decrease)
- st(s) — stitch(es)
- sp(s) — space(s)
- picot — ch 3, then sl st in the 3rd ch from hook