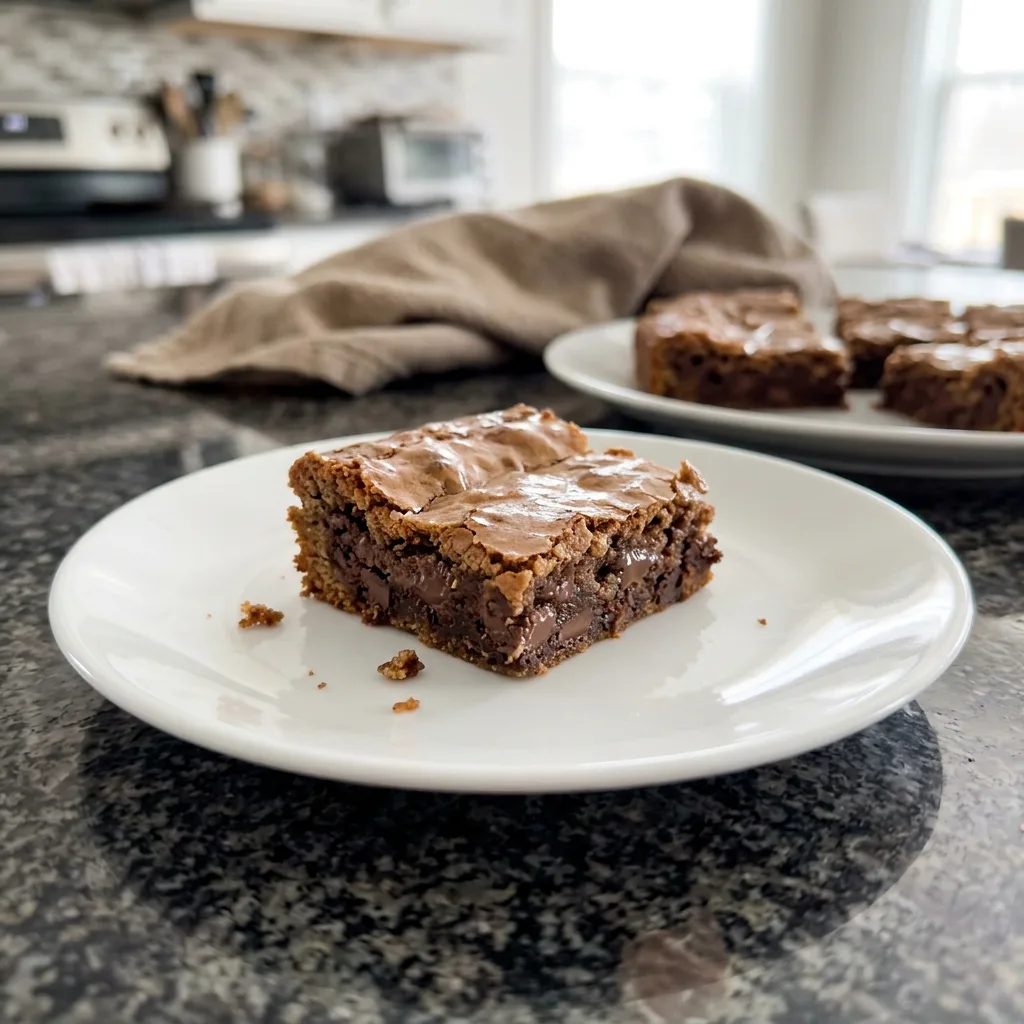
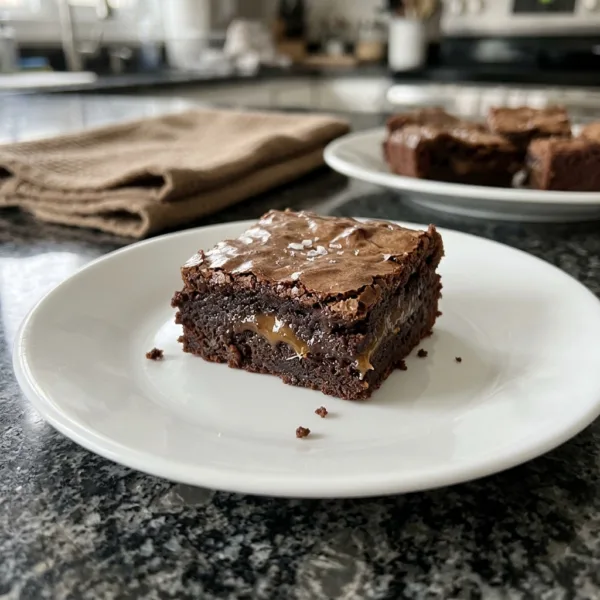
Thick, chewy cookie bars loaded with melty chocolate chips and finished with flaky sea salt, made in one bowl without a mixer.
Prep10 min
Cook25 min
Total35 min
Serves16
LevelEasy
What makes it special
Butter
Brown sugar
Flour
Chocolate chips
If you love the crisp edges and gooey centers of a classic chocolate chip cookie but do not feel like scooping dough onto trays, chewy chocolate chip cookie bars are your answer. You stir everything together in one bowl, press the dough into a pan and bake it. Forty minutes later you have thick, golden squares studded with melty chocolate and finished with a sprinkle of flaky sea salt. No mixer, no chilling and no batches.
These bars rely on melted butter and brown sugar, which is the secret to that deep caramel flavor and chewy bite. Because the butter is already melted, you can mix the dough with a whisk and a spatula, and the bars come together in about ten minutes of hands on time. They are perfect for bake sales, school lunches, potlucks and any evening when you simply want something sweet.
Why you will love these chewy chocolate chip cookie bars
Here are the reasons this recipe has become a family favorite:
One bowl and no mixer. Melted butter means you can mix everything with a whisk and a spoon, so cleanup is minimal.
They are truly chewy. Brown sugar and a slightly underbaked center give the bars a soft, bendy texture instead of a dry crumb.
No chilling required. Cookie dough often needs a rest in the fridge. This dough goes straight into the oven.
Quick and easy. Ten minutes of prep and twenty five minutes of baking is all it takes.
They feed a crowd. One pan makes sixteen generous bars, which makes this recipe great for gatherings.
The ingredients are simple. Butter, sugar, an egg, flour and chocolate chips are all you need, and most kitchens have them already.
They keep well. The bars stay soft for days, so you can bake ahead without worry.
What are cookie bars?
Cookie bars are cookie dough baked in a pan instead of on a sheet. The dough spreads into one even layer, bakes as a single slab and gets cut into squares once it has cooled. Because the dough is thicker than a typical cookie, the edges turn golden and slightly crisp while the center stays soft and chewy. You get the best of both worlds in every bite, and you skip the work of portioning and rotating multiple trays.
Cookie bars are also more forgiving than cookies. There is no spreading to worry about, no risk of flat or burned edges and no need to bake in batches, so they are a great choice for beginner bakers and busy parents.
Ingredients you will need
This recipe uses simple ingredients, but each one plays an important role. Exact amounts are in the recipe card above.
Unsalted butter, melted. Melted butter gives bars a denser, chewier texture than creamed butter. Using unsalted lets you control the salt.
Light brown sugar. Brown sugar contains molasses, which adds moisture, a caramel flavor and chew. Pack it into the measuring cup.
One large egg. The egg binds the dough and adds richness. Use one at room temperature if you can, so it blends smoothly.
Vanilla extract. Two teaspoons round out the flavor. Pure vanilla tastes best.
All purpose flour. It gives the bars structure. Measure by spooning the flour into the cup and leveling it off, so you do not pack in too much.
Baking powder. A small amount gives a little lift so the bars are not dense.
Salt. It balances the sweetness and makes the chocolate taste richer.
Semisweet chocolate chips. One cup goes in the dough, and an extra quarter cup on top makes the bars look bakery worthy.
Flaky sea salt. A pinch on the warm bars adds crunch and makes the chocolate flavor pop.
How to make chewy chocolate chip cookie bars
Step 1: Heat the oven and prepare the pan
Heat the oven to 350 degrees Fahrenheit, which is 175 degrees Celsius. Line a nine inch square baking pan with parchment paper, leaving an overhang on two sides. The overhang works as handles, so you can lift the whole slab out of the pan once it cools for clean slicing.
Step 2: Mix the wet ingredients
In a large bowl, whisk the melted butter with the brown sugar until the mixture looks smooth and glossy. Whisk in the egg and the vanilla until everything is combined and slightly lighter in color. The butter should be warm, not hot, so it does not scramble the egg.
Step 3: Add the dry ingredients
Add the flour, baking powder and salt. Switch to a spatula and stir just until no dry streaks remain. Stop mixing as soon as the flour disappears. Overmixing develops gluten and makes the bars tough instead of tender.
Step 4: Fold in the chocolate
Fold in one cup of chocolate chips. The dough will be thick, soft and a little sticky, which is exactly what you want.
Step 5: Press the dough into the pan
Transfer the dough to the prepared pan and press it into an even layer with your fingers or the back of a spatula. If the dough sticks, dampen your hands slightly. Scatter the extra quarter cup of chocolate chips over the top and press them in gently so they stay in place.
Step 6: Bake
Bake for twenty two to twenty five minutes, until the edges are golden brown and the center looks just set. The middle should still appear slightly soft. Remove the pan from the oven and sprinkle the bars with flaky sea salt right away, while the chocolate on top is still glossy.
Step 7: Cool and cut
Let the bars cool in the pan for at least thirty minutes. Lift them out using the parchment overhang and cut into sixteen squares with a sharp knife. For the neatest cuts, wipe the knife clean between slices.
Tips for the best cookie bars
Do not overbake. The bars continue to cook in the hot pan after you take them out. Pull them when the center is just set for a chewy result.
Measure flour carefully. Too much flour makes bars dry and cakey. Spoon and level, or use a kitchen scale with 190 grams.
Use parchment paper. It prevents sticking and lets you lift the bars out in one piece.
Cool before cutting. Warm bars fall apart. Patience gives you clean, thick squares.
Let the butter cool slightly. Hot butter can melt the sugar and make the bars greasy.
Chop some of the chocolate. A mix of chips and chopped chocolate bar creates pockets and ribbons of melted chocolate.
Add the sea salt right away. The salt sticks best to warm bars and makes the flavor richer.
Common mistakes to avoid
Baking until the center is firm. By the time the middle feels firm in the oven, the bars will be dry once they cool.
Overmixing the dough. Stir only until combined to keep the bars tender.
Using the wrong pan size. A larger pan spreads the dough thin and bakes it too fast. A nine inch square pan gives thick bars.
Skipping the parchment. Without it, the bars can stick to the pan and break when you cut them.
Cutting too early. Hot bars are soft and fall apart. Cool them completely for clean edges.
Using cold eggs and hot butter. The two extremes make the batter uneven. Let the egg sit out for a few minutes before using it.
Variations and substitutions
Dark brown sugar. It makes the bars a little more chewy, with a deeper molasses flavor.
Different chocolate. Try milk chocolate for a sweeter bar, dark chocolate for a richer one or white chocolate chips for contrast.
Add nuts. Fold in half a cup of chopped walnuts or pecans for crunch.
Peanut butter swirl. Drop spoonfuls of peanut butter over the dough and swirl it in before baking.
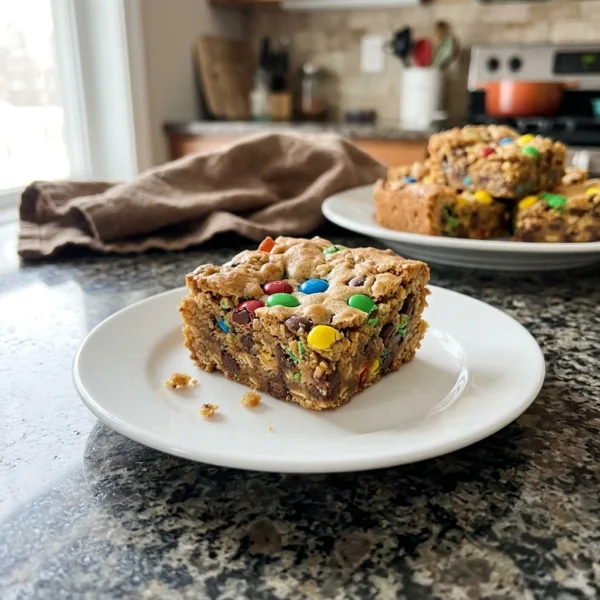
M and M bars. Replace the top chocolate chips with colorful candy coated chocolates for a party version.
Toffee crunch. Stir in a half cup of toffee bits for a buttery crunch.
Oatmeal twist. Replace half a cup of flour with old fashioned oats for a heartier bite.
Gluten sensitive. Use a one to one gluten free baking flour blend and let the bars cool completely before cutting.
Brown butter bars. Brown the butter in a saucepan first, then cool it slightly for a toasty, nutty flavor.
Larger batch. Double the recipe and bake in a nine by thirteen inch pan for twenty eight to thirty two minutes.
What to serve with cookie bars
These bars are wonderful on their own, but a few pairings turn them into a real dessert:
A scoop of vanilla ice cream on a warm bar for a quick sundae.
A cold glass of milk for the classic cookie experience.
A cup of hot coffee or tea for an afternoon treat.
Whipped cream and fresh berries for a lighter finish.
Hot fudge or caramel sauce for an extra indulgent plate.
A dessert board with the bars, fruit and nuts for entertaining.
Make ahead, storage and freezing
Make ahead
You can bake the bars a day or two in advance, and they stay soft and chewy. They are an ideal make ahead dessert for parties and holiday gatherings. You can also mix the dough, press it into the pan, cover it and refrigerate it for up to a day before baking. Add a minute or two to the baking time if the dough goes into the oven cold.
Storing
Keep the cut bars in an airtight container at room temperature for up to four days. Place a sheet of parchment between layers so they do not stick together. A slice of bread in the container helps keep them soft.
Freezing
Wrap the cut bars individually or stack them with parchment between layers in a freezer safe container. Freeze for up to three months and thaw at room temperature for about thirty minutes. You can also freeze the unbaked dough pressed into the pan and bake it straight from the freezer, adding about five minutes to the time.
Reheating
For a warm, gooey bar, microwave a single piece for ten to fifteen seconds. The chocolate softens and the center becomes tender, almost like fresh from the oven.
Why melted butter makes chewier bars
The texture of a baked treat depends heavily on how the butter is handled. When you cream softened butter with sugar, you beat tiny air bubbles into the mixture, which creates a lighter, cakier crumb. Melted butter skips that step. It coats the flour and limits gluten formation while keeping moisture in the dough, and the result is a denser, fudgier and chewier bar.
Brown sugar adds to this effect. It holds onto moisture, so the bars stay soft for days, and its molasses gives the flavor of caramel. Together, melted butter and brown sugar are the reason these cookie bars have that bendy, chewy bite that people love.
Cookie bars versus cookies
A traditional cookie has more surface area, so it develops crisp edges and a slightly crunchy bottom. A bar bakes in a thick layer, so the edges set while the center stays soft. Bars are also much faster to make, since you do not need to portion dough or rotate trays, and the whole pan bakes in one go. If you love a gooey center, bars are often the better choice. If you prefer a crunchy cookie, bake the dough in smaller portions on a sheet pan for ten to twelve minutes.
Choosing the right chocolate chips
Semisweet chips are the classic choice, because their slightly bittersweet flavor balances the sugar in the dough. Milk chocolate chips taste sweeter and creamier, while dark chocolate chips give a more grown up, intense bite. For bakery style bars with big melty pools, replace half of the chips with a chopped chocolate bar. Chopped chocolate melts more evenly than chips, which hold their shape because they contain stabilizers, and it creates the thin shards and ribbons that make a cookie bar look special.
Whichever chocolate you choose, scatter the extra chips on top before baking. They soften in the oven and give the bars a glossy, inviting surface that looks as good as it tastes.
A note on pans and baking times
A metal nine inch square pan gives the best result, because it conducts heat evenly and browns the edges. Glass and ceramic pans hold heat longer, so reduce the oven to 325 degrees Fahrenheit and add a few minutes if you use one. A dark metal pan browns faster, so check the bars at twenty minutes. If you only have an eight inch pan, the bars will be thicker and need about five extra minutes, and a ten inch pan will make thinner bars that bake in about twenty minutes. Every oven runs a little differently, so trust the look of the bars more than the timer: golden edges and a center that looks just set are your signals.
Gifting and sharing cookie bars
These bars travel well, which makes them an excellent gift or potluck dish. Let them cool completely, cut them into neat squares and stack them in a tin with parchment between the layers. Tie a ribbon around the tin, and you have a thoughtful homemade present that takes almost no effort. For bake sales, wrap each bar in clear cellophane and add a small label with the flavor. They hold up in a lunchbox, in a backpack and on a picnic blanket, and they never need refrigeration.
Frequently asked questions
Can I use dark brown sugar?
Yes. Dark brown sugar makes the bars a little more chewy, with a deeper molasses flavor.
Can I double the recipe?
Yes. Use a nine by thirteen inch pan and bake for twenty eight to thirty two minutes.
How do I store them?
Keep them in an airtight container at room temperature for up to four days.
Can I freeze them?
Yes. Wrap the cut bars well and freeze for up to three months, then thaw at room temperature.
Why are my bars dry?
They were likely overbaked or the flour was packed into the measuring cup. Remove the pan while the center still looks slightly soft and measure the flour by spooning and leveling.
Why did my bars fall apart when I cut them?
They were probably cut while warm. Let them cool in the pan for at least thirty minutes, then lift them out with the parchment.
Can I use salted butter?
Yes. Reduce the added salt in the dough to a quarter teaspoon and taste the dough before baking.
Can I make them without an egg?
You can replace the egg with a quarter cup of unsweetened applesauce, though the bars will be a little softer and more cake like.
Final thoughts
Chewy chocolate chip cookie bars are everything you love about a classic cookie in an easier, faster form. One bowl, ten minutes and a hot oven are all you need to turn pantry staples into thick, golden squares with melty chocolate and a hint of sea salt. Bake a pan for a weekend treat, a lunchbox surprise or a party tray, and watch them disappear.
If you make this recipe, I would love to hear how it turned out for you. Leave a rating and a comment below, and tell me who you shared them with.
Chewy chocolate chip cookie bars with golden edges, melty chocolate and a sprinkle of sea salt. One bowl, no mixer, ready in 40 minutes.
Bars Easy American
Prep
10 min
Cook
25 min
Total
35 min
Servings
16
Ingredients 9 items
Tap to check off as you go
For the bars
Instructions 7 steps
1
Heat the oven
Heat the oven to 350 F (175 C) and line a 9 inch square pan with parchment paper, leaving an overhang on two sides.
2
Mix the wet ingredients
Whisk the melted butter and brown sugar until smooth, then whisk in the egg and vanilla.
3
Add the dry ingredients
Stir in the flour, baking powder and salt just until no dry streaks remain.
4
Add the chocolate
Fold in 1 cup of chocolate chips.
5
Press into the pan
Press the dough into an even layer and scatter the extra 1/4 cup of chocolate chips over the top.
6
Bake
Bake 22 to 25 minutes, until the edges are golden and the center looks just set. Sprinkle with flaky sea salt right away.
7
Cool and cut
Cool in the pan for at least 30 minutes, lift out with the parchment and cut into 16 bars.
Nutrition per serving
Calories
190
Protein
2g
Carbs
28g
Fat
8g
Sugar
19g
Fiber
1g
Sodium
110mg
Questions, answered
Can I use dark brown sugar?
Yes. Dark brown sugar makes the bars a little more chewy with a deeper molasses flavor.
Can I double the recipe?
Yes. Use a 9 by 13 inch pan and bake 28 to 32 minutes.
How do I store them?
Keep in an airtight container at room temperature for up to 4 days.
Can I freeze them?
Yes. Wrap the cut bars well and freeze up to 3 months, then thaw at room temperature.
Recipe by
Denise
Home cook, baker and serial recipe tweaker. I share the dishes my family asks for most, written step by step so they turn out right in your kitchen too.