Denise's Creative Corner Crochet · Kitchen
Free Crochet Patterns Handmade with Love

Christmas Granny Square Bed Cover Crochet Pattern
Jump to Pattern
Christmas Granny Square Bed Cover Crochet Pattern
90-120 Hours 0 made this
Intermediate Level

Simple granny squares, joined and edged with a scalloped border.

90-120 Hours

Squares are portable, so you can make them a few at a time.

A Cozy Heirloom

A full size bed cover in Christmas red, forest green and cream.

About This Christmas Granny Square Bed Cover Crochet Pattern Pattern

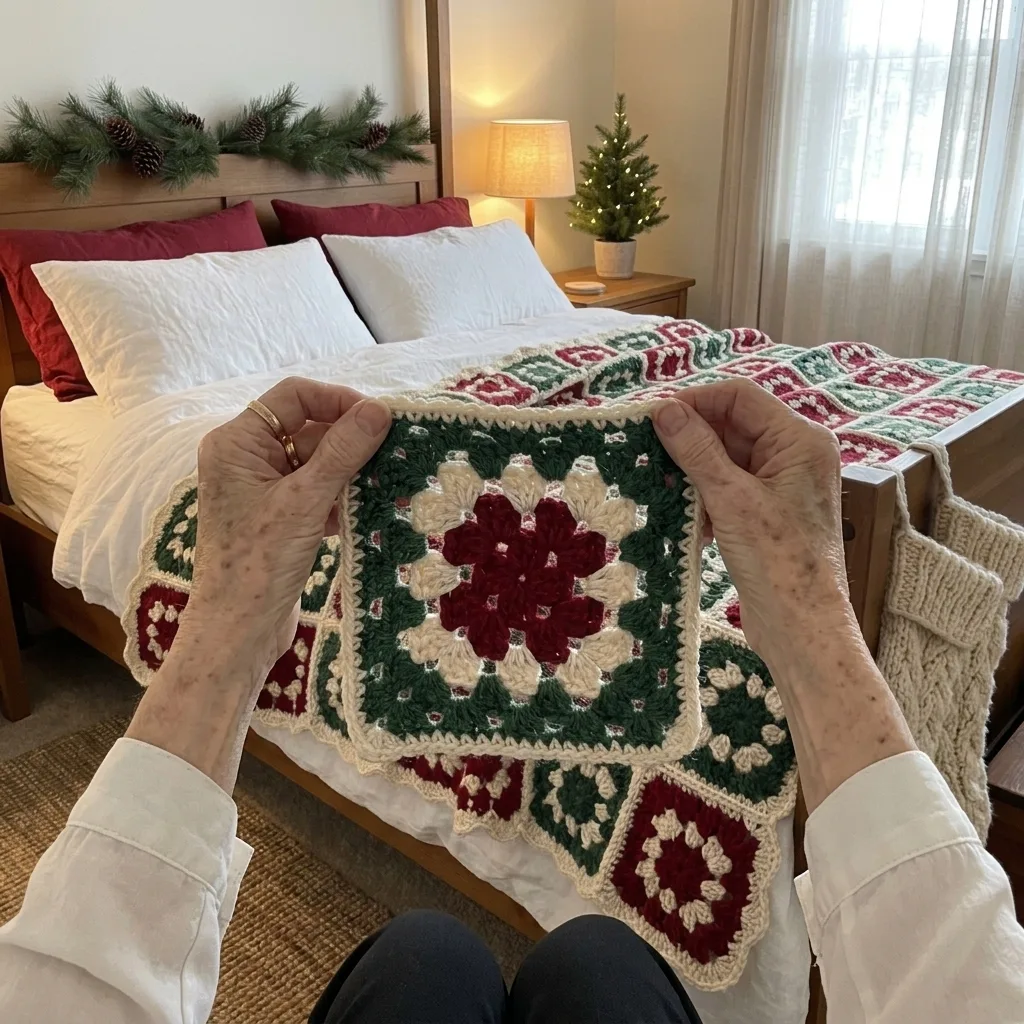
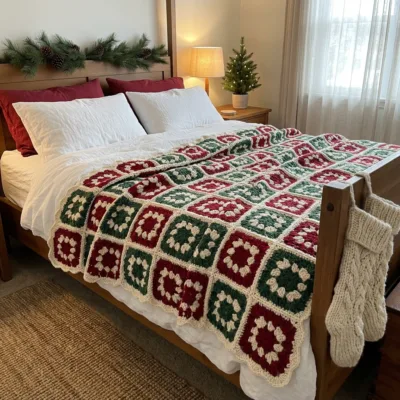
This Christmas bed cover is made from 99 classic granny squares in red, forest green and cream, set in a checkerboard and finished with a cream scalloped border. It measures about 72 by 87 inches, so it covers a full or queen bed.

Every square uses only chains, double crochet and slip stitches. If you can make a granny square, you already know how to make every part of this pattern.
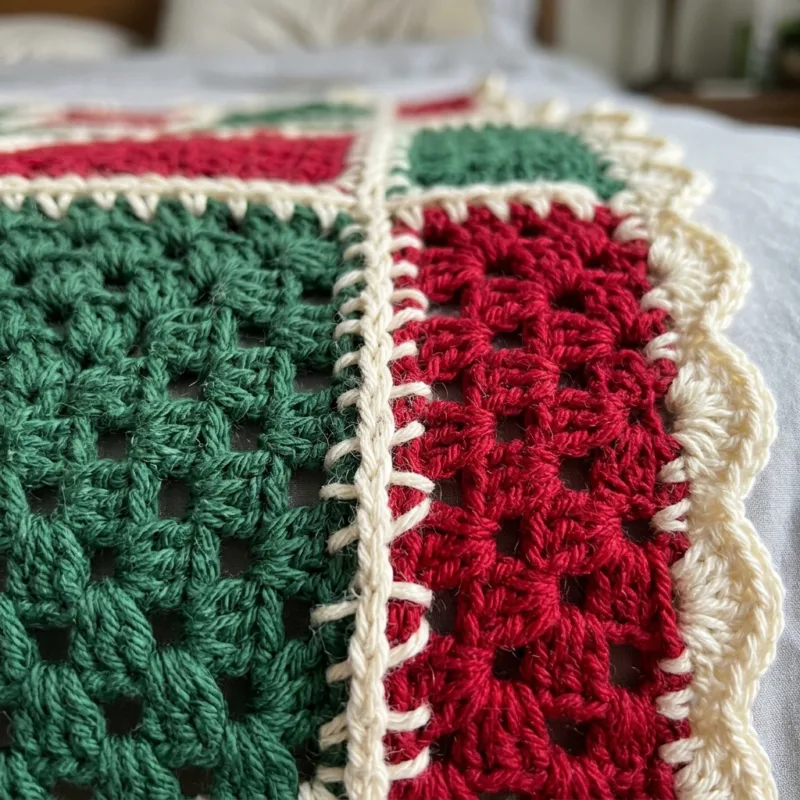
Christmas Granny Square Bed Cover Crochet Pattern step detail

Why You'll Love This Christmas Granny Square Bed Cover Crochet Pattern Pattern

I love that this big project is really just one small square, repeated. You can crochet one in an evening, carry the next one in your bag, and watch the checkerboard grow a little at a time.

It also looks wonderful on a bed at Christmas, with red pillows and a little tree on the nightstand. I think it makes a gift people keep for years.

Switch Things Up

Try a navy, cream and gold palette for a winter bed cover, or make fewer squares for a cozy throw: a 5 by 6 grid gives about 40 by 45 inches. You can also swap the scalloped border for a plain row of single crochet, or use one solid color for the last two rounds of every square.


Materials Needed

— Main Fabric

01 Worsted weight (4) 100% cotton yarn, about 190 yards per 100 g
02 Cream: about 1,500 g (roughly 2,850 yards), for the squares, seams and border
03 Christmas red: about 1,000 g (roughly 1,900 yards)
04 Forest green: about 1,000 g (roughly 1,900 yards)
05 Amounts are estimates, so buy a little extra of each color

— Tools Required

06 5.0 mm (H-8) crochet hook
07 Yarn needle
08 Scissors
09 Measuring tape
10 Blocking mats and rust-proof pins
11 Stitch markers

The Free Pattern

Intermediate 90-120 Hours

0% complete

— Granny Square A, Red Center (Make 50) :

Use a 5.0 mm hook. Each square should measure about 7.5 inches across after blocking. Change color at the end of a round by fastening off and joining the new color with a sl st in any corner sp.
Round 1 (red): Ch 4 and join with a sl st to form a ring. Ch 3 (counts as first dc), 2 dc in the ring, ch 2. *3 dc in the ring, ch 2.* Repeat from * 2 more times. Join with a sl st to the top of the beginning ch 3. (12 dc, 4 ch-2 corner sps)
Round 2 (red): Sl st in each of the next 2 dc and in the first ch-2 sp. Ch 3, (2 dc, ch 2, 3 dc) in the same sp. Ch 1. *(3 dc, ch 2, 3 dc) in the next ch-2 sp, ch 1.* Repeat from * 2 more times. Join with a sl st to the top of the beginning ch 3. (24 dc, 4 corners, 4 ch-1 sps)
Round 3 (red): Sl st in each of the next 2 dc and in the first corner sp. Ch 3, (2 dc, ch 2, 3 dc) in the same sp. *Ch 1, 3 dc in the next ch-1 sp, ch 1, (3 dc, ch 2, 3 dc) in the next corner sp.* Repeat from * 2 more times, then ch 1, 3 dc in the last ch-1 sp, ch 1. Join with a sl st to the top of the beginning ch 3. Fasten off. (36 dc, 4 corners, 8 ch-1 sps)
Round 4 (cream): Join cream with a sl st in any corner sp. Ch 3, (2 dc, ch 2, 3 dc) in the same sp. *(Ch 1, 3 dc in the next ch-1 sp) across the side, ch 1, (3 dc, ch 2, 3 dc) in the next corner sp.* Repeat from * 2 more times, then (ch 1, 3 dc in the next ch-1 sp) across the last side, ch 1. Join with a sl st to the top of the beginning ch 3. (48 dc, 4 corners, 12 ch-1 sps)
Round 5 (cream): Sl st in each of the next 2 dc and in the first corner sp. Work as Round 4, working 3 dc in every ch-1 sp along each side. Join. Fasten off. (60 dc, 4 corners, 16 ch-1 sps)
Round 6 (forest green): Join forest green with a sl st in any corner sp. Work as Round 4, working 3 dc in every ch-1 sp along each side. Join. (72 dc, 4 corners, 20 ch-1 sps)
Round 7 (forest green): Sl st in each of the next 2 dc and in the first corner sp. Work as Round 4, working 3 dc in every ch-1 sp along each side. Join. Fasten off and weave in the ends. (84 dc, 4 corners, 24 ch-1 sps)

— Granny Square B, Green Center (Make 49) :

Work exactly like Square A, with the colors swapped. Every round count is the same.
Rounds 1 to 3 (forest green): Work Rounds 1 to 3 of Square A in forest green. Fasten off. (36 dc, 4 corners, 8 ch-1 sps)
Rounds 4 and 5 (cream): Work Rounds 4 and 5 of Square A in cream. Fasten off. (60 dc, 4 corners, 16 ch-1 sps)
Rounds 6 and 7 (red): Work Rounds 6 and 7 of Square A in red. Fasten off and weave in the ends. (84 dc, 4 corners, 24 ch-1 sps)

— Layout and Joining :

Block every square to 7.5 inches before you join them. Equal squares are what keep the edges of the bed cover straight.
Grid: Lay the squares out in 11 rows of 9 squares. Start Row 1 with a Square A and alternate A and B across and down, so the colors form a checkerboard. (99 squares: 50 A, 49 B)
Seams: With cream and a yarn needle, whipstitch the squares into 11 rows of 9, sewing through the back loops only. Then whipstitch the rows together the same way, matching the corners. (10 horizontal seams, 88 vertical seams)

— Scalloped Border :

The border adds about 2 inches on every side and hides the seam ends at the edge.
Round 1 (cream): Join cream with a sl st in any outer corner sp. Ch 1, 3 sc in the corner sp. Work 1 sc in each dc and each ch-1 sp along the edge, and 1 sc in each seam. Work 3 sc in each outer corner sp. Join with a sl st to the first sc. (251 sc along each top and bottom edge, 307 sc along each long side, 3 sc in each corner, 1,128 sc total)
Round 2 (cream): Ch 1. *Skip 2 sc, 5 dc in the next sc, skip 2 sc, sl st in the next sc.* Repeat from * around. Put the middle dc of a scallop in the center sc of each corner. If a side does not divide evenly, skip 1 or 3 sc instead of 2 in a few spots. Join with a sl st, fasten off and weave in the ends. (about 188 scallops, 940 dc)

Assembly Instructions

  1. Weave in all ends on every square before you block it.
  2. Pin each square to a blocking mat at 7.5 inches, wet or steam it lightly, and let it dry flat.
  3. Lay out 11 rows of 9 squares in a checkerboard, starting Row 1 with a Square A.
  4. With cream yarn, whipstitch the squares of each row together through the back loops only.
  5. Whipstitch the 11 rows together, matching every corner so the seams cross in clean plus signs.
  6. Work Round 1 of the border in cream, with 3 sc in each outer corner and 1 sc in every seam.
  7. Work the scallop round, then block the whole bed cover lightly so the scallops lie flat.

Common Mistakes & How to Fix Them

Squares that end up different sizes make the edges wavy. Block every square to 7.5 inches before joining.

Skipping the corner ch-2 makes a square curl. Count your corners at the end of every round.

Pulling the seaming yarn too tight puckers the bed cover. Sew loosely and flat.

Mixing up the A and B squares breaks the checkerboard. Sort them into two piles before you lay them out.


Denise photo
Denise

Denise designs easy-to-follow crochet patterns for cozy handmade homes.


Important Notes

Each square should measure 7.5 inches across after blocking. If yours are smaller, go up a hook size.

The yarn amounts are estimates, so check them against your own gauge before you start.

Cotton makes a heavy bed cover. Wash it gently in cool water and dry it flat.


I hope this bed cover makes your holidays a little cozier. Take it one square at a time, and enjoy every one.

Crochet Abbreviations

01 ch — chain
02 sl st — slip stitch
03 sc — single crochet
04 dc — double crochet
05 sp — space
06 sps — spaces

You Ask, We Answer

How big is the finished bed cover?

About 72 by 87 inches including the scalloped border. It fits a full or queen bed with a little drape.

Can I use a different yarn?

Yes. Any worsted weight yarn works, but check your square size and adjust the number of squares to reach the size you want.

How do I wash it?

Machine wash on gentle in cool water or hand wash, then dry it flat. Reshape the scallops while it is damp.